 |
|||
|
|
|||
|
|
|||
| ||||||||||
|
|
 TM 10-3930-673-34
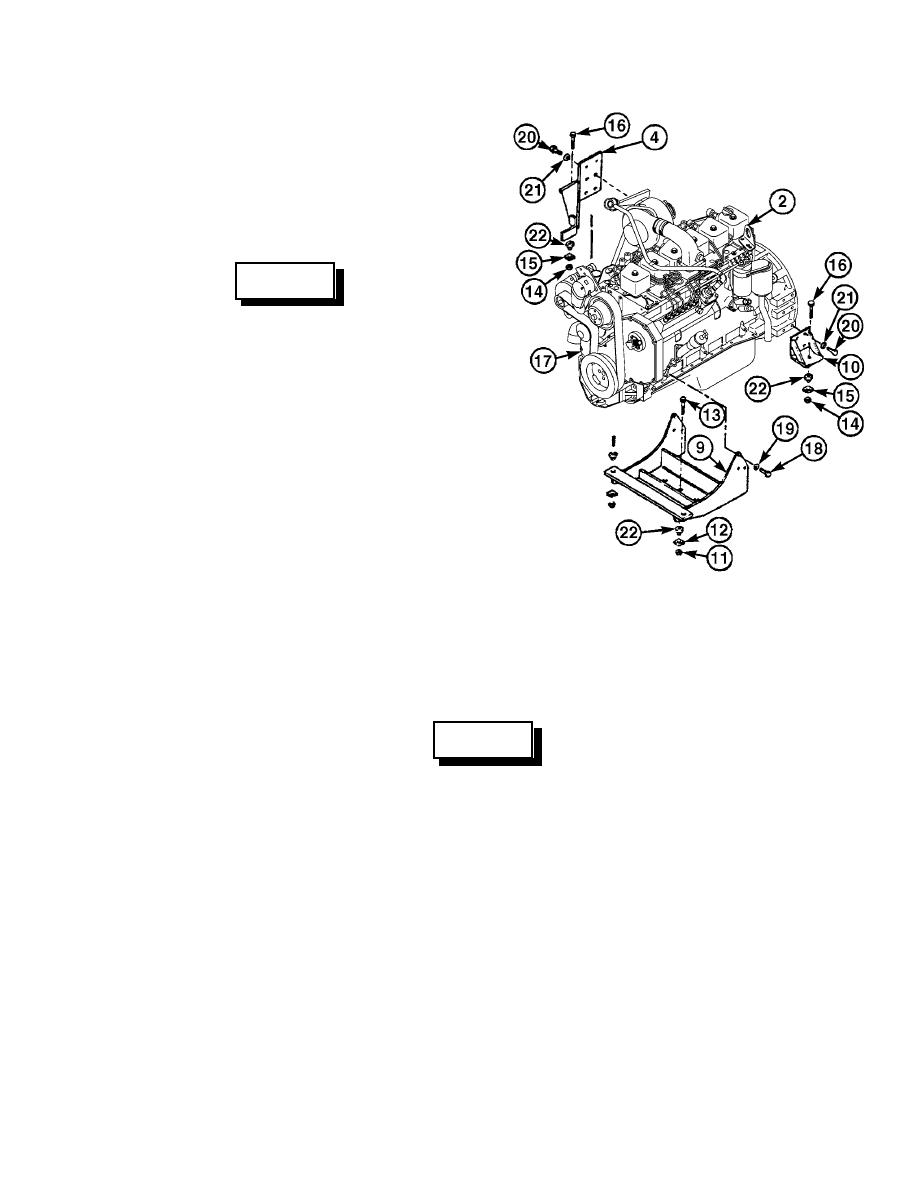
d. Installation.
(1)
Install rubber mounts (22) into
vehicle frame.
(2)
Install engine mounts (9, 4, and 10)
on engine (17).
WARNING
Adhesives, solvents, and sealing
compounds can burn easily, can give
off harmful vapors, and are harmful
to skin and clothing. To avoid injury
or death, keep away from open fire
and use in a well-ventilated area. If
adhesive, solvent, or sealing
compound gets on skin or clothing,
wash immediately with soap and
water.
(a)
Apply sealing compound to threads
of screws (18 and 20).
(b)
Install right front engine
TR01773
mount (10), lockwashers (21), and
screws (20) on engine (17).
(c)
Install left front engine mount (4), lockwashers (21), and screws (20) on engine (17).
(d)
Position rear engine mount (9) on engine (17). Install six screws (18) and lockwashers (19).
WARNING
Engine assembly weighs 1,075 lb (487.61 kg). Attach suitable lifting device prior to
removal to prevent possible injury to personnel.
(3)
Attach engine mounts (9, 4, and 10) to vehicle frame, and remove lifting chains.
(a)
If engine was lifted for engine mounts removal, slowly lower engine onto rubber mounts (22)
and align engine mounts (9, 4, and 10) to rubber mounts.
(b)
Install two screws (16), washers (15), and nuts (14) on engine mounts (4 and 10). Tighten nuts
to 307 lb-ft (416.24 Nm).
(c)
Install screw (13), washer (12), and nut (11) on engine mount (9). Tighten nut to 307 lb-ft
(416.24 Nm).
3-27
|
|
Privacy Statement - Press Release - Copyright Information. - Contact Us |
