| |
TM 10-3930-671-24
10.2. Hydraulic System Relief Pressure
Check & Adjustment
Relief Pressure Check and Adjustment Procedure ............................................................... F-455
Relief Pressure Setting Check .............................................................................................. F-455
Hydraulic System Relief Pressure Specifications.................................................................. F-456
Relief Pressure Adjustment................................................................................................... F-456
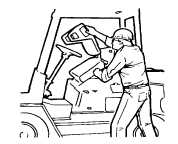
Relief Pressure Check
and Adjustment Procedure
Following is the general procedure for checking an
setting main hydraulic valve lift and auxiliary relief
pressure, for the GPX 25 E truck.
Hydraulic system relief pressure setting may be checked
using with a conventional pressure gauge with suitable
pressure range calibration. A gauge with capacity range
of 0 to 4000 psi (0 to 27580 kPa) mini mum is
recommended.
NOTE
To
perform
this
service
procedure,
It
is
recommended that you first:
•
Park truck on a level surface and fully
lower the upright.
•
Put blocks under the upright rails and
•
Raise the drive wheels off the floor.
•
Return all controls to neutral, apply
parking brake, and turn key switch OFF,
except as directed.
WARNING
Do not use your hands to check for
hydraulic leakage. Use a piece of
cardboard or paper to search for
leaks. Escaping fluid under pressure
can penetrate the skin causing
serious injury. Relieve pressure
before disconnecting hydraulic or
other lines. Tighten all connections
before applying pressure. Keep
hands and body away from pin holes
and nozzles which eject fluids under
high pressure. If any fluid is injected
into the skin, it must be surgically
removed within a few hours by a
doctor familiar with this type injury or
gangrene may result.
Relief Pressure Setting Check
1.
Open the engine compartment side door (RH or
LH door, as noted later) and raise the seat deck.
Be sure the seat deck support is securely
latched.
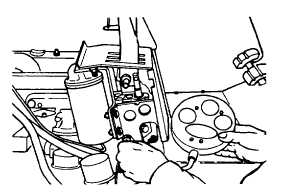
2.
The diagnostic check port quick-disconnect
fitting (with cap) for making hydraulic system
pressure checks is located on the right-hand
side of the main hydraulic valve. See notice
below.
3.
Remove the cap and connect pressure gauge to
the diagnostic check port fitting on the valve.
4.
Start the engine and let it warm up until it runs
smoothly.
F-455
|