| |
TM 10-3930-664-24
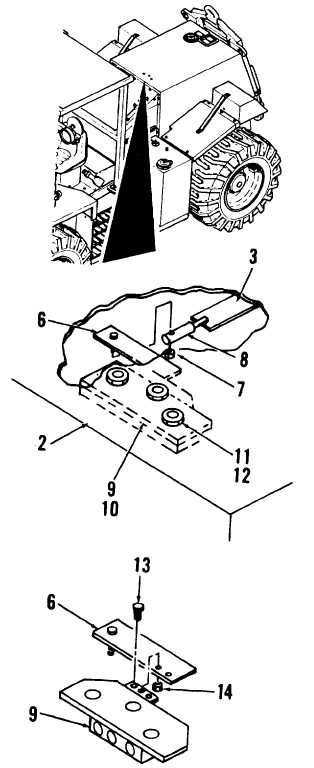
4.
Release latch actuator arm (3) from stud on
latch linkage (6) by removing nut (7).
5.
Remove rod end (8) from latch actuator arm (3)
only if replacement is required.
6.
Remove assembled latch linkage (6), rotary latch
(9), and latch spacer (10) from hood assembly
(2) by removing screws (11) and nuts (12).
7.
Remove linkage (6) from rotary latch (9) by
removing screws (13) and nuts (14).
B. CLEANING
Clean hood latch and linkage in accordance with
paragraph 1-24.
C. INSPECTION
1.
Inspect hood handle, rotary latch, and related
components in accordance with paragraph 1-24.
2.
Work hood handle and rotary latch to ensure
smooth operation.
D. INSTALLATION
1.
Install latch linkage (6) onto rotary latch (9) using
screws (13) and nuts (14).
2.
Install assembled latch linkage (6), rotary latch
(9), and latch spacer (10) onto hood assembly
(2) using screws (11) and nuts (12).
3.
Install rod end (8) onto latch actuator arm (3).
4.
Secure latch actuator arm (3) to stud on latch
linkage (6) using nut (7).
2-346
|