| |
TM 10-3930-660-34
9-3.REAR AXLE ASSEMBLY - REPLACE/REPAIR (Cont’d)
a.
Place floor jack under center of axle assembly. Use floor jack to raise axle assembly. Have assistant hold
axle assembly steady.
b.
Remove stands or blocks.
c.
Lower floor jack to allow axle assembly to clear frame.
d.
Carefully move axle under vehicle with jack and
position axle pivot hole in line with frame pivot
holes.
e.
Use floor jack to carefully raise axle assembly
while assistant holds assembly steady. Keep
shims (6) in position.
f.
Raise floor jack until axle pivot pin hole is
aligned with frame pivot pin holes.
3.
INSTALL PIVOT PIN (3).
a.
Secure rear axle to frame with axle pivot pin (3).
b.
Secure axle pivot pin with retaining bolt (5) and
new locknut (4). Torque bolt (5) to 100 lb. ft.
4.
INSTALL REAR PROPELLER SHAFT, TM10-3930-
660-20.
5.
INSTALL REAR DISC BRAKE ASSEMBLIES,
PARA. 10-3.
6.
INSTALL REAR WHEEL ASSEMBLIES, TM10-3930-
660-20.
7. USE A FLOOR JACK TO RAISE REAR OF VEHICLE
UNTIL VEHICLE FRAME CLEARS JACKSTANDS.
REMOVE JACKSTANDS AND CAREFULLY LOWER
VEHICLE.
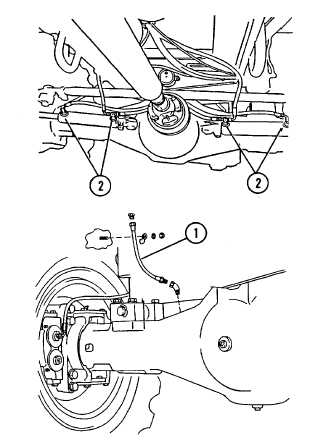
8. CONNECT REAR STEERING CYLINDER
HYDRAULIC SUPPLY HOSES (2).
9-7
9.
CONNECT AXLE BREATHER HOSE (1) TO
FRAME.
10.
INSTALL COUNTERWEIGHT,
TM 10-3930-660-20.
|