 |
|||
|
|
|||
|
|
|||
| ||||||||||
|
|
 TM 10-3930-660-24-2
MLRS ATTACHMENT CYLINDER REPAIR - CONTINUED
0308 00
ASSEMBLY
NOTE
Wipe all sealing surfaces on cylinder clean and dry. Apply film of clean lubricating oil to all seals as they are
installed.
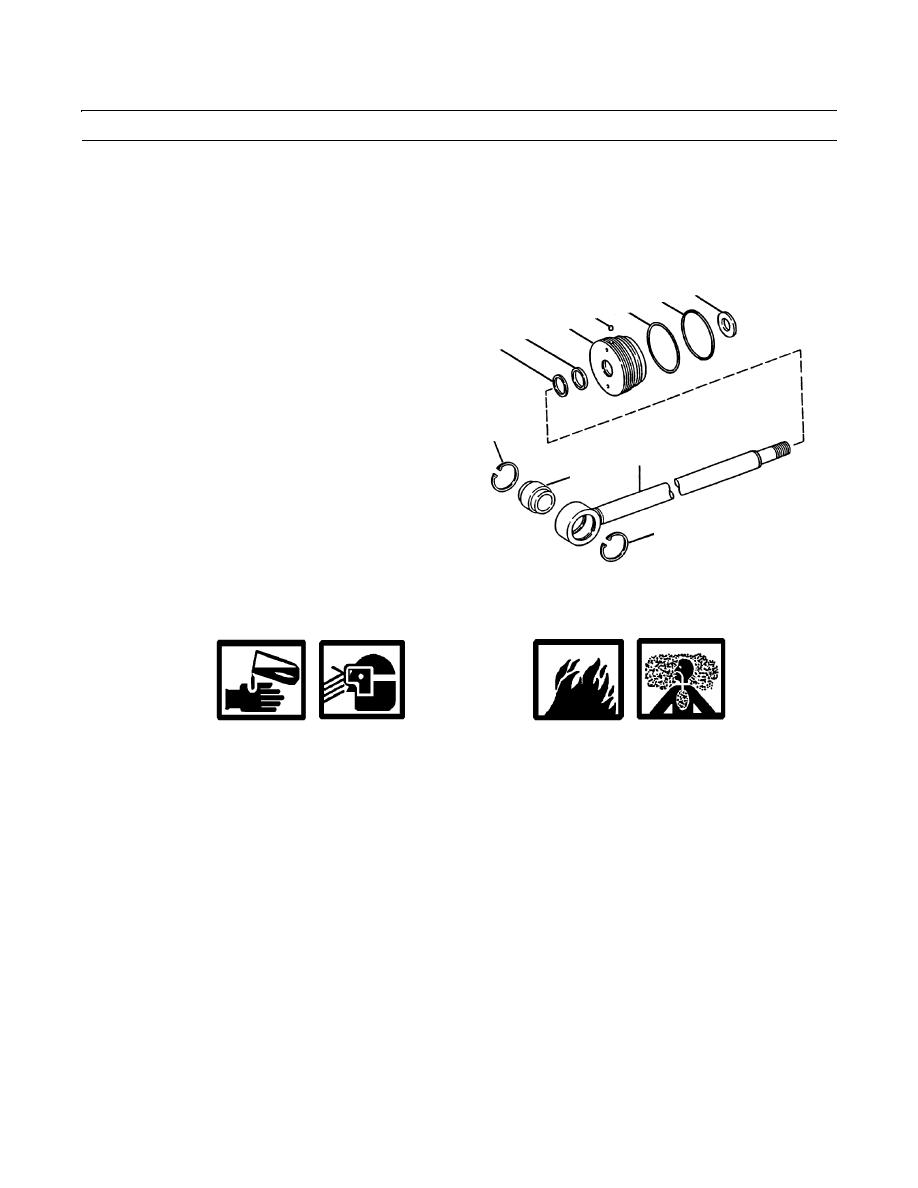
1.
Press new bushing (24) in rod (8).
18
11
2.
Install two snap rings (23) on new bushing (24).
19
20
9
3.
Install new seal (21) and rod wiper (22) inside gland
21
(9).
22
4.
If removal was necessary, install lock pellet (20).
5.
Install new back-up ring (19) and new O-ring (11) on
outside diameter of gland (9).
6.
Slide gland (9) and washer (18) onto rod (8).
23
8
24
23
409-1471
7.
Lubricate piston (16) inner diameter with clean lubricating oil. Install new O-ring (17) inside bore of piston (16).
WARNING
Solvent cleaning compound, MIL-PRF-680 Type III is an environmentally compliant and low toxic mate-
rial. However, it may be irritating to the eyes and skin. Use protective gloves and goggles. Use in well-ven-
tilated areas. Keep away from open flames and other sources of ignition.
8.
Use cleaning solvent to clean threads on rod (8) and nut (14).
9.
Slide piston (16) and washer (15) onto rod (8).
10.
Apply loctite on threads of rod (8) and nut (14). Install nut (14) on rod (8).
11.
Place rod (8) and piston (16) assembly on supports to prevent damage during assembly.
12.
Install two new wear rings (12) and one new seal (13) on piston (16). Position new wear rings so that gaps are 180
degrees apart.
0308 00-4
|
|
Privacy Statement - Press Release - Copyright Information. - Contact Us |
