 |
|||
|
|
|||
|
|
|||
| ||||||||||
|
|
 TM 10-3930-660-24-2
TRANSMISSION ASSEMBLY REPAIR - CONTINUED
0289 00
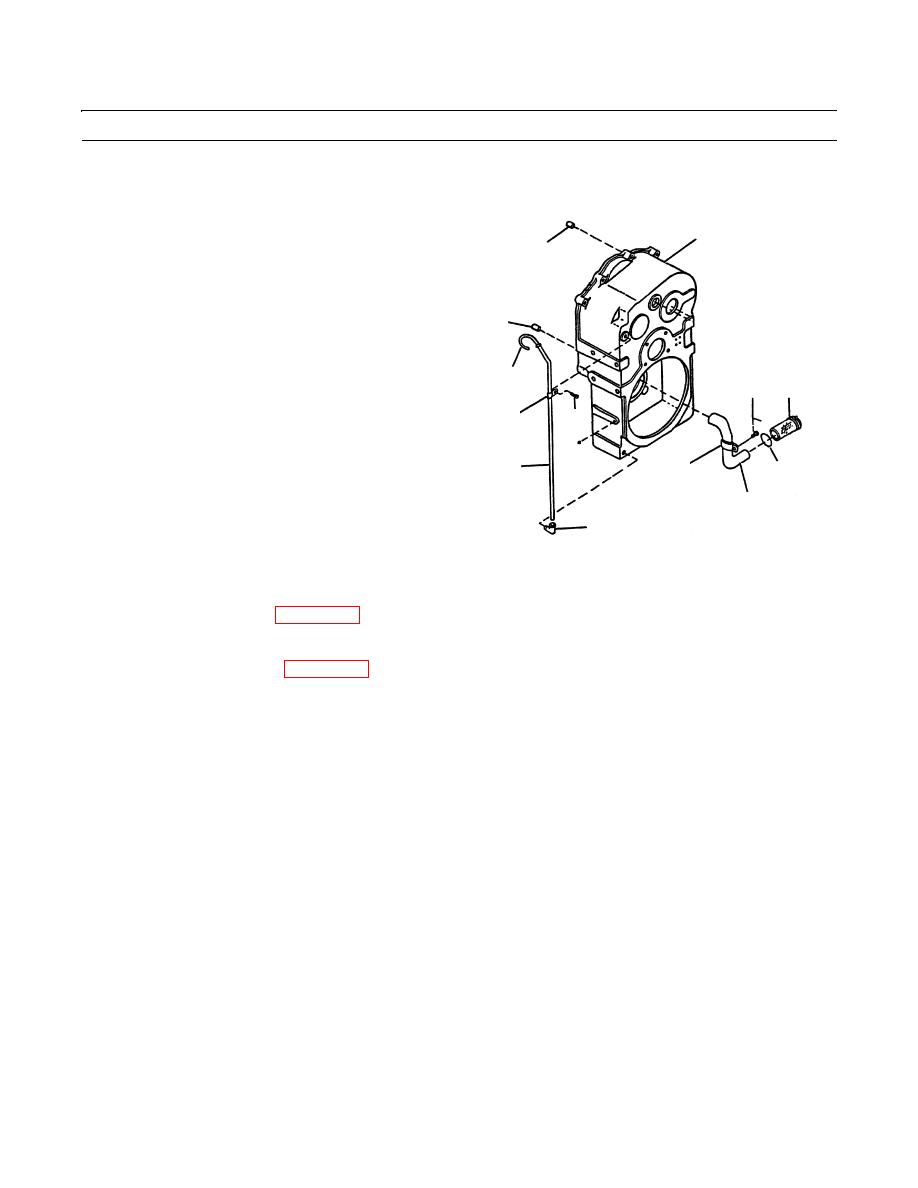
DISASSEMBLY - CONTINUED
54.
Remove capscrew (70), clamp (71), dipstick (72), dipstick tube (73) and elbow (74) from transmission case (75).
55.
Remove two locating bushings (76).
75
56.
Remove suction screen (77) and gasket (78). Discard
76
gasket.
57.
Remove capscrew (79) from clamp (80) and remove
suction tube (81).
76
72
79
77
71
70
73
80
78
81
74
409-1173
CLEANING
See Cleaning instructions (WP 0316 00).
INSPECTION
See Inspection instructions (WP 0317 00).
ASSEMBLY
1.
Install suction tube (81) and secure with clamp (80) and capscrew (79).
2.
Install new gasket (78) and suction screen (77).
3.
Install two locating bushings (76).
4.
Install elbow (74), dipstick tube (73), dipstick (72), clamp (71) and capscrew (70) on transmission case (75).
0289 00-11
|
|
Privacy Statement - Press Release - Copyright Information. - Contact Us |
