 |
|||
|
|
|||
|
|
|||
| ||||||||||
|
|
 TM 10-3930-660-24-2
CRANKSHAFT MAINTENANCE - CONTINUED
0271 00
INSTALLATION - CONTINUED
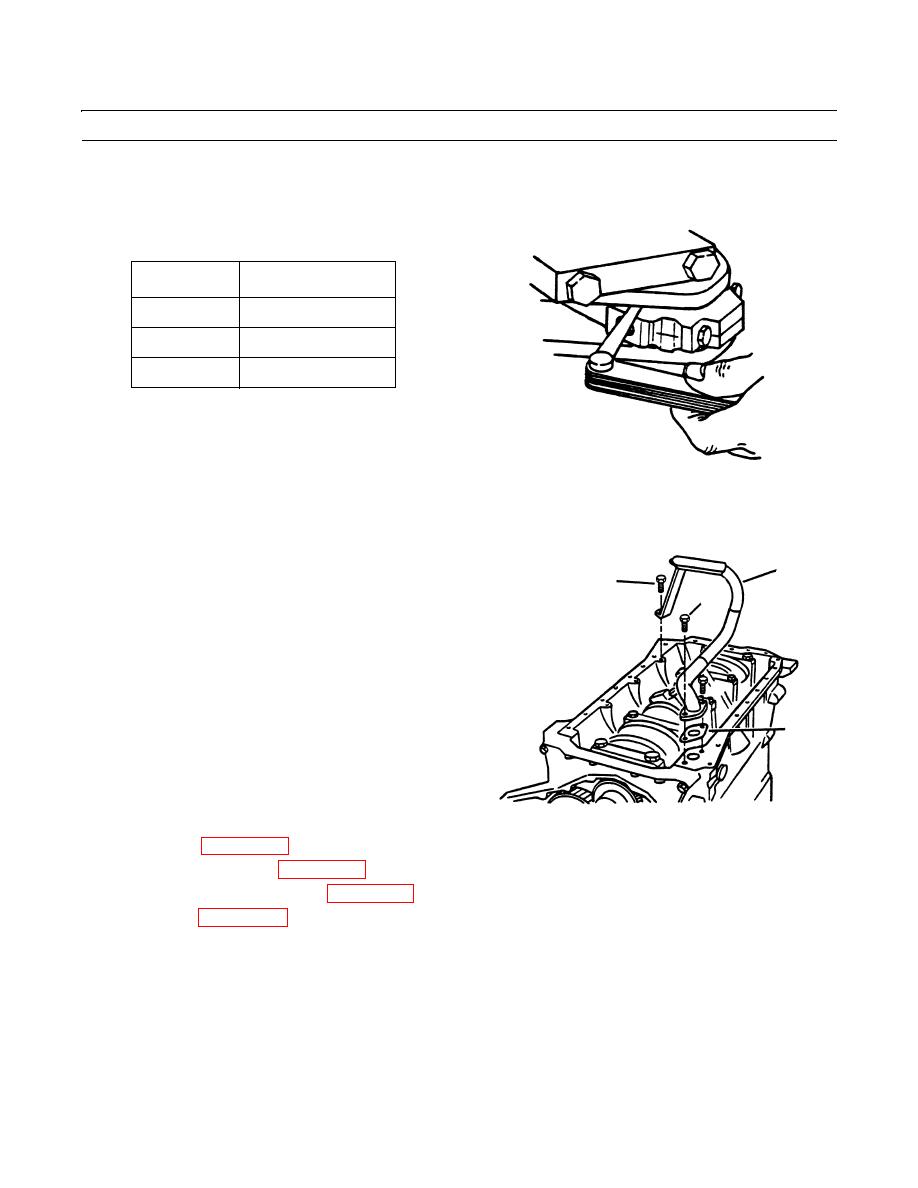
43.
The connecting rod capscrews (8) must be tightened evenly in a series of three steps. The torque value for each step is
shown below.
Step
Torque Valve
1
26 lb-ft (35 Nm)
2
50 lb-ft (71 Nm)
3
73 lb-ft (99 Nm)
409-926
44.
Repeat steps 39 thru 43 for the other five connecting rods.
45.
Measure connecting rod side play at each connecting rod assembly.
46.
Wear tolerance is 0.012 in. (0.304 mm) maximum.
5
47.
If side play exceeds wear tolerance stated in previous
4
step, replace connecting rod and connecting rod cap.
3
48.
Install new gasket (6) on cylinder block.
49.
Position oil suction tube (5) over new gasket (6) and
install capscrews (3 and 4).
50.
Torque capscrews (3 and 4) to 18 lb-ft (24 Nm).
6
409-899
51.
Install oil pan (WP 0219 00).
52.
Install front housing cover (WP 0280 00).
53.
Install flywheel housing and cover (WP 0215 00).
54.
Install engine (WP 0209 00).
55.
Operate engine, check for proper operation and leaks (TM 10-3930-660-10).
END OF WORK PACKAGE
0271 00-15/(-16 Blank)
|
|
Privacy Statement - Press Release - Copyright Information. - Contact Us |
