 |
|||
|
|
|||
|
|
|||
| ||||||||||
|
|
 TM 10-3930-660-24-1
ENGINE COOLING FAN REPLACEMENT - CONTINUED
0059 00
REMOVAL - CONTINUED
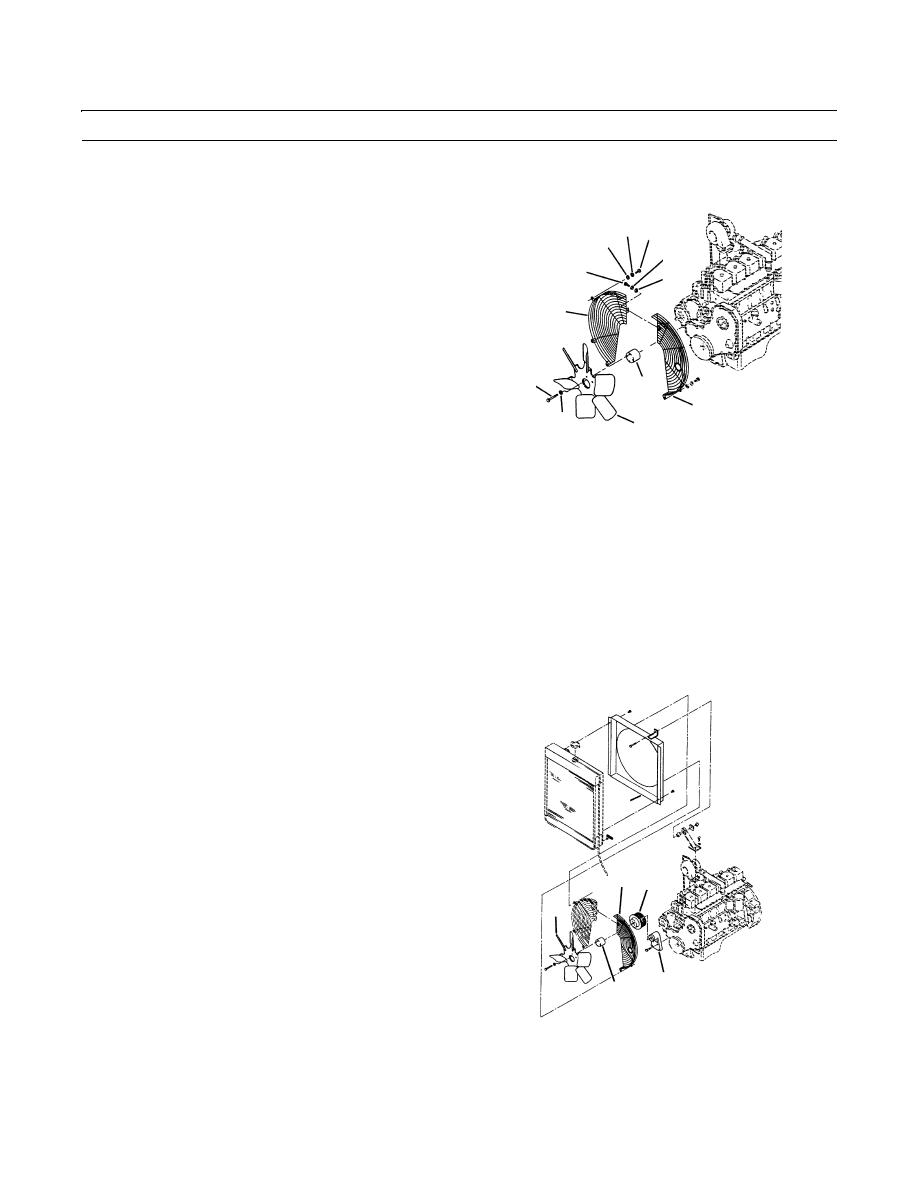
4.
Remove five screws (7), five flatwashers (8) and five
8 7
lockwashers (9) retaining the left half of the fan guard
9
(10). Remove fan guard half (10). Discard lockwash-
8
7
ers.
9
5.
Remove four screws (11) and four flatwashers (12)
10
from the fan (13).
6.
Separate the fan (13) from the spacer (14). Rest the fan
against the right half of the fan guard (15). Remove
the spacer, then remove the fan and pulley (16).
11
14
15
12
13
409-244
INSTALLATION
CAUTION
To prevent damage to the engine, install the fan with the concave side of the blades toward the engine.
NOTE
The prybar installed during removal may have to be loosened to install the fan.
1.
Position the fan (13) loosely into the radiator shroud
(4) opening. Rest fan on right guard (15).
2.
Position pulley (16) and spacer (14) align bolt holes of
fan (13), spacer and pulley.
CAUTION
4
Do not use lockwashers to secure the fan.
Use only flatwashers.
3.
Apply loctite to threaded area of four screws (11).
15 16
Install four screws and flatwashers (12) to secure fan
(13). Torque to 6 lb-ft (8 Nm).
13
17
14
409-245
4.
Install left guard half (10) using five screws (7), five flatwashers (8) and five new lockwashers (9).
0059 00-2
|
|
Privacy Statement - Press Release - Copyright Information. - Contact Us |
