 |
|||
|
|
|||
|
Page Title:
ENGINE OIL FILLER NECK REPLACEMENT |
|
||
| ||||||||||
|
|
 TM 10-3930-660-24-1
ENGINE OIL FILLER NECK REPLACEMENT
THIS WORK PACKAGE COVERS
Removal, Installation
INITIAL SETUP
Equipment Condition
Tools and Special Tools
Tool kit, general mechanic's (Item 39, WP 0324 00)
Vehicle parked on level ground (TM 10-3930-660-
10)
Materials/Parts
Engine off and cool (TM 10-3930-660-10)
O-ring (4)
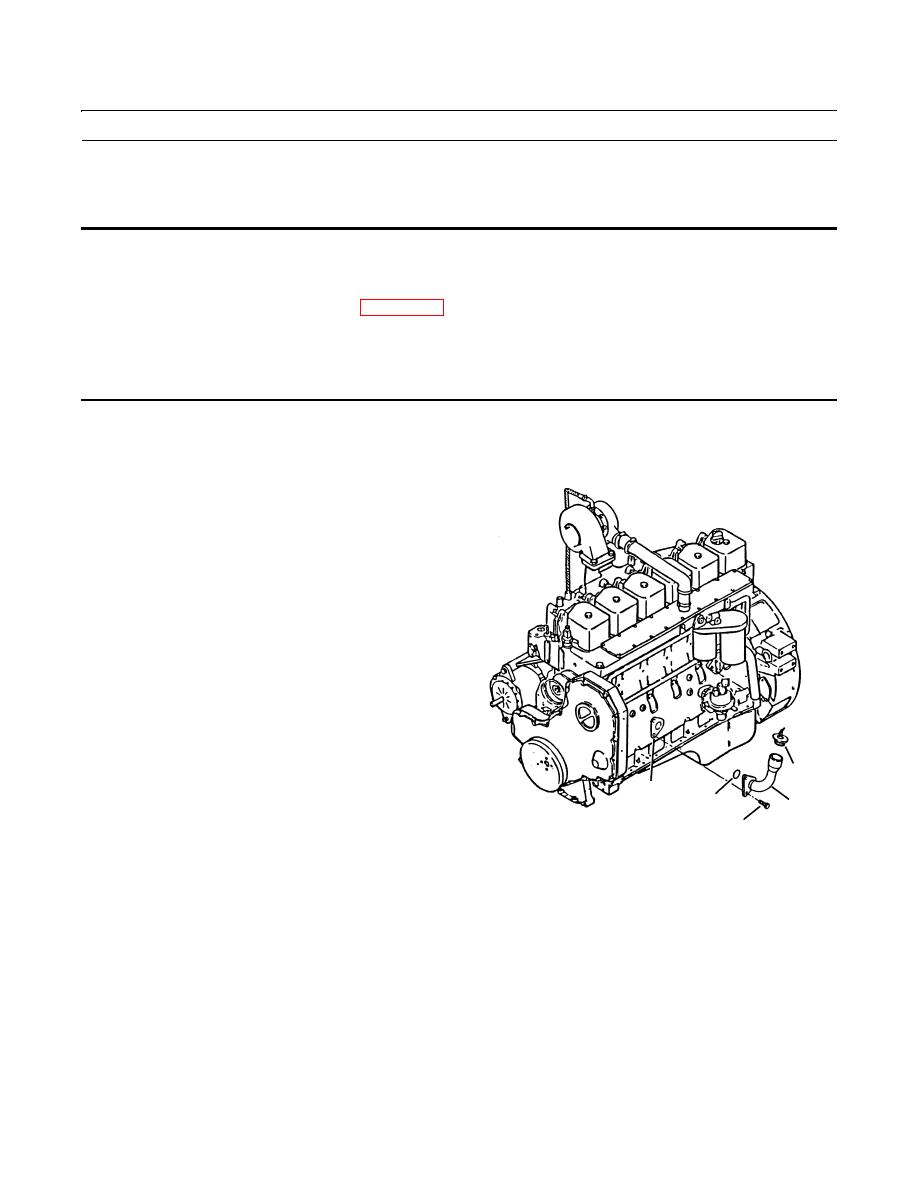
REMOVAL
NOTE
The engine oil filler neck is accessed through
the right-hand engine access door.
1.
Remove cap (1) from oil filler neck (2).
2.
Support oil filler neck (2) and remove two capscrews
(3).
3.
Remove oil filler neck (2) and O-ring (4) from engine
(5). Discard O-ring.
1
5
4
2
3
409-152
INSTALLATION
1.
Align and support new O-ring (4) and oil filler neck (2) on engine (5).
2.
Install oil filler neck (2) with two capscrews (3). Torque capscrews (3) to 32 lb-ft (43 Nm).
3.
Install cap (1) on oil filler neck (2).
END OF WORK PACKAGE
|
|
Privacy Statement - Press Release - Copyright Information. - Contact Us |
