| |
TM10-3930-660-210
18-7.
MLRS ATTACHMENT CONTROL VALVE ASSEMBLY
- REPLACE (Cont'd)
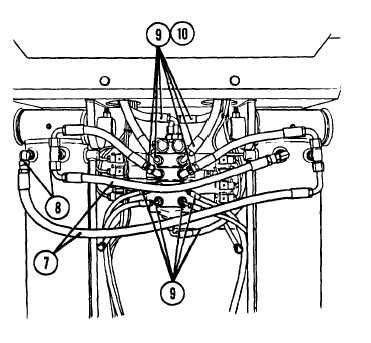
3. TAG AND REMOVE CROSSOVER HOSES.
a. Tag both crossover hoses (7).
b. Unscrew crossover hoses at fittings
(8) and remove crossover hoses (7).
4. TAG AND REMOVE ELEVEN HYDRAULIC HOSES
FROM CONTROL VALVE.
a. Tag eleven hydraulic hoses (9).
b, Unscrew eleven hydraulic hoses (9)
at fittings (10) and remove from
valve.
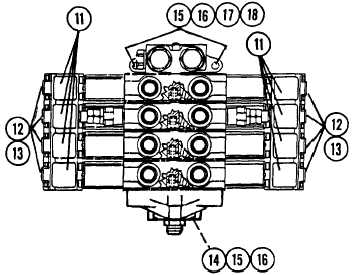
5. TAG AND DISCONNECT EIGHT ELECTRICAL
CONNECTORS.
a. Loosen eight connector retaining
screws (11).
b. Tag eight electrical connectors
(12).
Gaskets (13) placed between connectors
(11) and valve may drop out when
connectors are unplugged.
c. Unplug eight electrical connectors
(12) from valve.
6. REMOVE MOUNTING HARDWARE AND VALVE.
Secure valve during the following
procedure so it does not drop.
a.
b.
c.
Remove bottom capscrew (14),
lockwasher (15), and spacer (16).
Discard lockwasher (15).
Remove top two hex nuts (17),
lockwashers (15), spacers (16),
and capscrews (18). Discard
lockwashers (15).
Remove valve.
18-31
|