| |
TM 10-3930-653-14&P
(5) INSTALLING CRANKSHAFT
Install the crankshaft bearing caps with spring washers
and bolts. and tighten the bolts
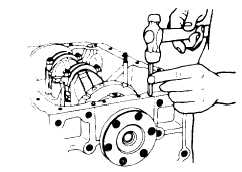
(1) Install seals on both sides of rear crankshaft bearing
cap. Face wire backed (hard) side of seal toward cap.
Fig. 4-83. Installing Rear Bearing Side Seals.
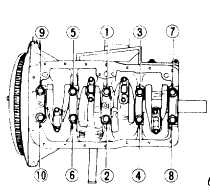
Fig. 4-84. Torque Sequence of Main Bearing Cap Bolts.
(2) Install front and rear caps with their arrow marks to
front.
(3) Move crankshaft in an axial (shaft) direction so that
center bearing cap is properly aligned and then tighten
crankshaft bearing caps to prescribed tightening torque.
(4) Do not tighten caps all at once Tighten them in 3 or 4
stages beginning from inside to out (repeating tightening
sequence 3 or 4 times until completely tightened to
prescribed tightening torque).
(5) While tightening caps, check crankshaft to make
sure that it turns freely.
Cranking ( crankshaft turning) torque should be 2.0
kg-m (14 ft-lb) or less.
Tightening torque:
Main bearing cap
8.5 to 11 kg-m
(61 to 80 ft-lb)
(6) INSTALLING FLYWHEEL
(1) Install flywheel housing.
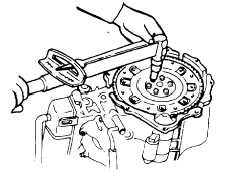
(2) Install flywheel with bolts and lock plates. and bend
lock plates from outside for safety lock.
Fig. 4-85. Installing Flywheel.
Tighten crank nuts
Tightening torque:
Flywheel
6.0 to 7.5 kg-m
(43 to 54 ft-lb)
(7) INSTALLING PISTONS
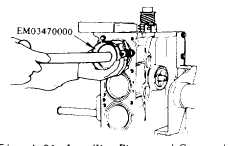
Fig. 4-86. Installing Piston and Connecting
Rod Assembly.
4-45
|