 |
|||
|
|
|||
|
Page Title:
Section II. PREPARATION FOR USE |
|
||
| ||||||||||
|
|
 SECTION II
PREPARATION FOR USE
2-1. GENERAL.
2-2. When a new or reconditioned truck is first
received by the using organization, it is necessary
t o determine that the vehicle is in satisfactory
c o n d i t i o n and will operate properly when first
placed into service. For this reason, follow closely
t h e service procedures outlined in the following
paragraphs.
2-3. PRELIMINARY INSPECTION.
2-4. Visually inspect the vehicle upon receipt for
obvious damage, such as broken, cracked, dented
or missing parts. Unpack any removable equipment
and check against the packing list to determine
that all items are furnished and in good condition.
Report any damage, errors or discrepancies on the
appropriate forms.
2-5. Check the following for proper quantity:
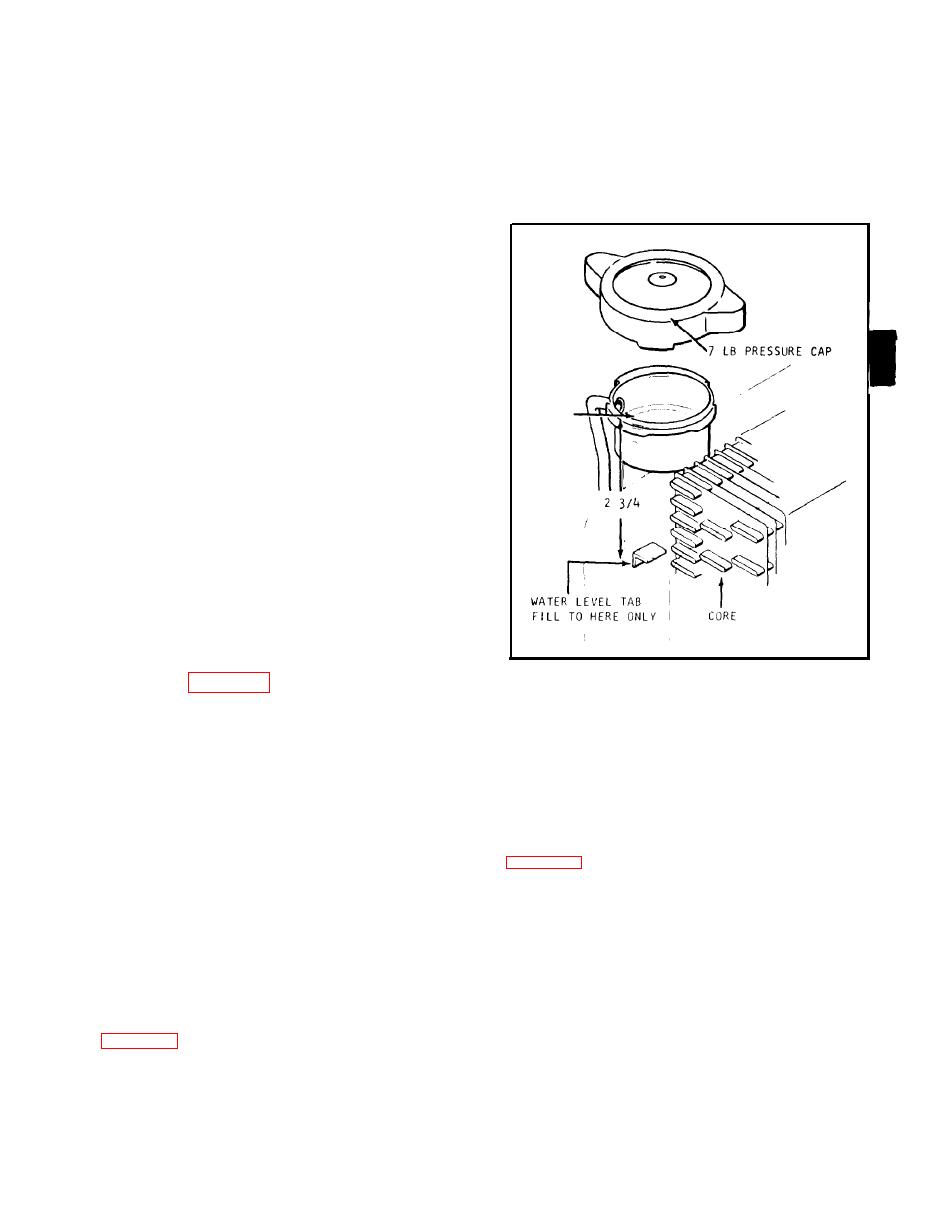
a. Engine Coolant Level -- Remove radiator cap.
Check to see that coolant level reaches the metal
tab located 2-3/4 inches below the top of the filler
neck. (See figure 2-1.)
Figure 2-1. Checking Coolant Level
b. Fuel Level -- Remove fuel filler cap and
d. Transmission Fluid Level -- The transmission
strainer, or check instrument panel gage reading
with ignition switch "ON".
dipstick is located in the differential housing
b e t w e e n the drive wheels under the front dash
support. Easier access may be gained for dipstick
Note
removal by tilting the upright forward. Check fluid
level on dipstick with engine running and
If
vehicle
has
been
shipped
with
a
transmission in neutral, with parking brake set. See
preservative in the fuel tank, a prominent
tag will be attached to the machine
indicating this fact. Drain the fuel tank of
e. Inching and Brake Master Cylinder Fluid Level
preservative by
removing drain plug
-- Check fluid level in each master cylinder by
directly underneath the tank.
removing filler cap. Fluid level should be 1/4 inch
below top of filler neck.
C. Engine Oil Level --
Open the engine
f . Hydraulic Fluid Level -- Remove hydraulic
compartment side panels and raise seat support for
sump filler cap on top of right side frame. A
engine access. R e m o v e d i p s t i c k o n l e f t s i d e o f
dipstick is incorporated in the filler cap to indicate
engine and check oil level, shown on dipstick. See
fluid level in the sump.
2-1
|
|
Privacy Statement - Press Release - Copyright Information. - Contact Us |
