 |
|||
|
|
|||
|
Page Title:
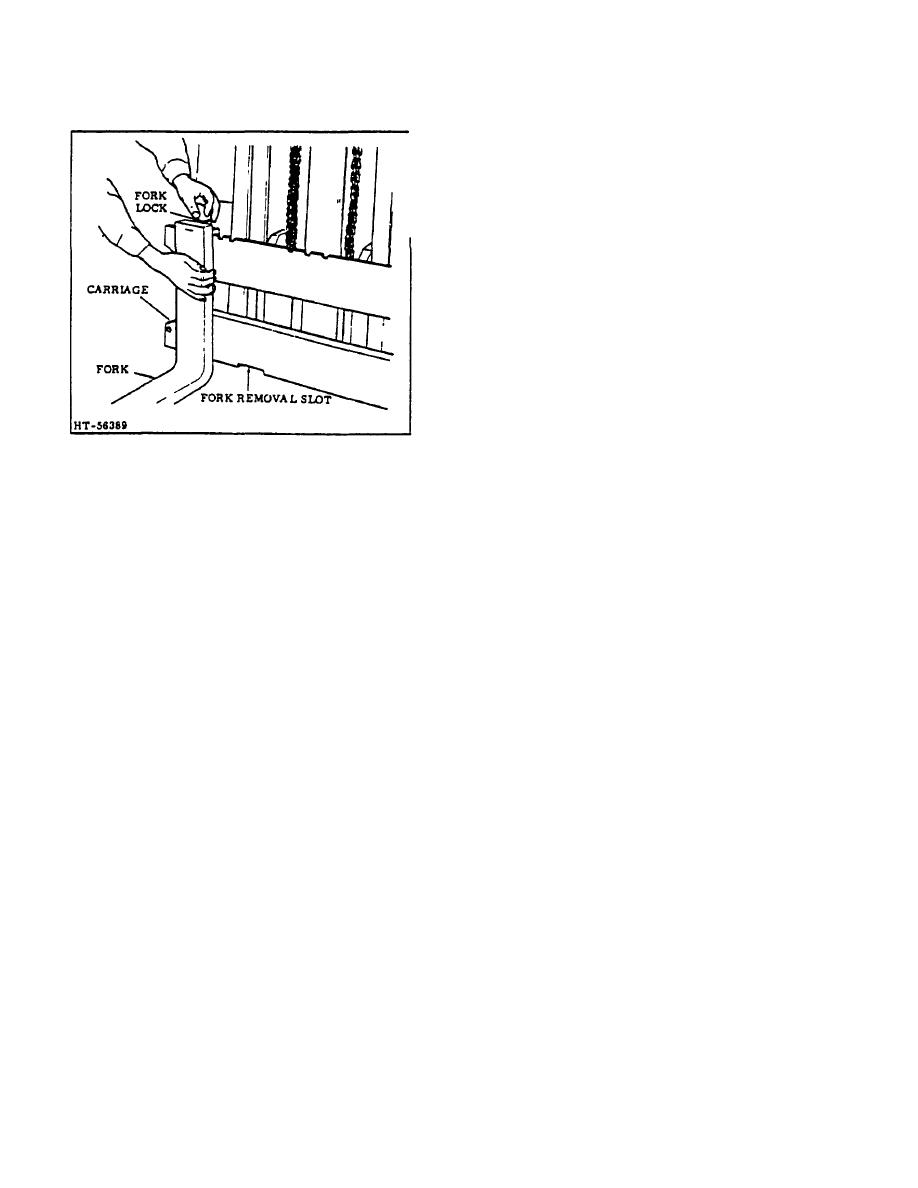
Figure 6. Fork Adjustment and Removal |
|
||
| ||||||||||
|
|
 TM 10-3930-644-14&P
3. Tilt the lower portion of the fork forward and up,
releasing the lower hanger from the lower
carriage bar.
4. Refer to cautionary note in Paragraph A above,
and lift fork off upper carriage bar.
C. SERVICE
1. Inspect hook fork and locking mechanism for
any evidence of wear or damage.
2. If locking mechanism is worn or damaged,
remove and replace it as a unit.
3. If fork is defective, then replace with same type
and capacity rated fork.
D. INSTALLATION
Figure 6. Fork Adjustment and Removal
(Hook Type)
B. REMOVAL
1. Carefully lift fork up onto upper carriage
mounting slot, then slowly lower until back of
(Hook Type)
fork rests against carriage face and bottom fork
hook passes through lower carriage cut-out.
1. Lower fork carriage until base of fork just clears
the floor.
2. Release the fork lock pin an slide fork left or
right until properly positioned for anticipated load
2. Release the fork lock pin and slide fork to a
clearance/balance requirements.
position over the cut-out in the lower carriage
bar (Figure 6).
3-198
|
|
Privacy Statement - Press Release - Copyright Information. - Contact Us |
