 |
|||
|
|
|||
|
Page Title:
Figure 15. Differential Carrier and Assembly |
|
||
| ||||||||||
|
|
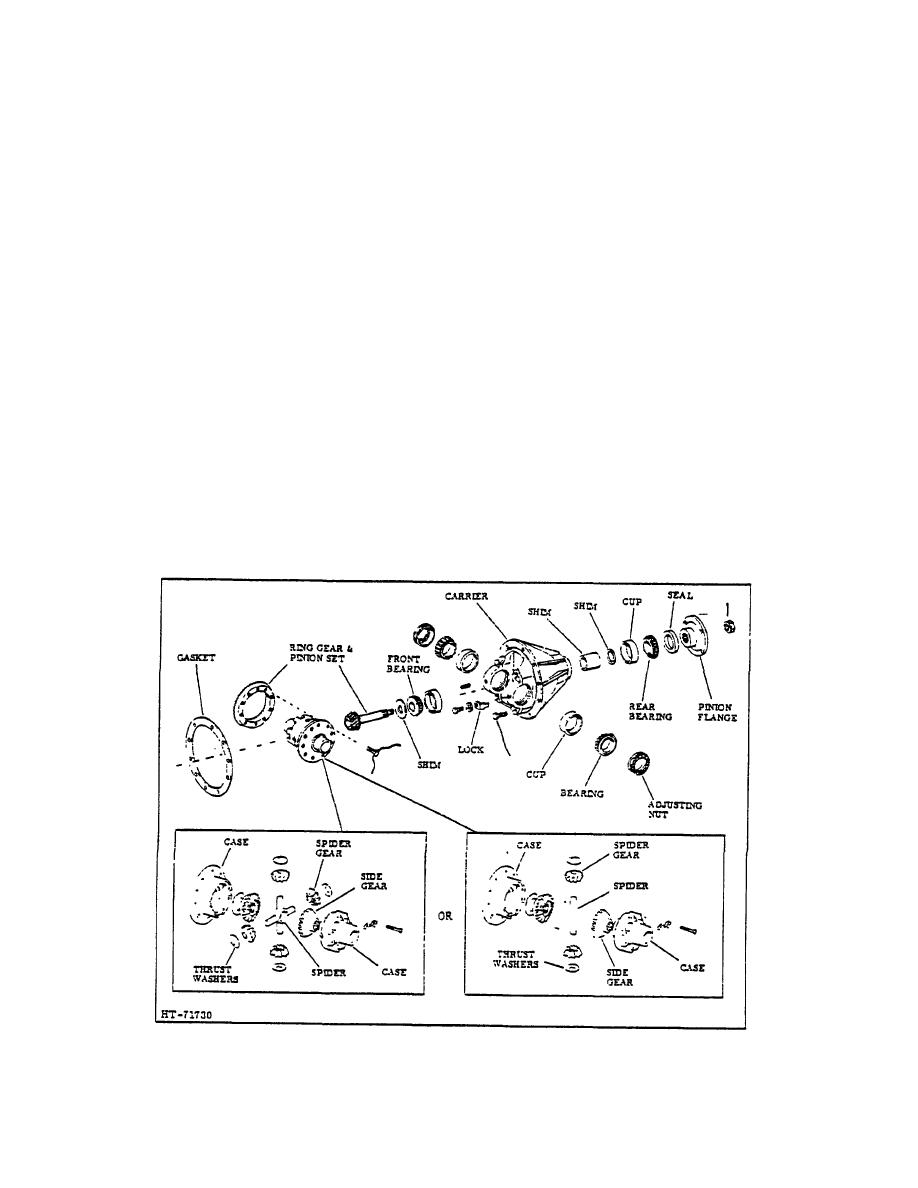 TM 10-3930-644-14&P
C.
DISASSEMBLY- PINION DIFFERENTIAL.
See
NOTE
Figure 16.
It may be necessary to lightly tap the
carrier housing in order to free it
Pinion Removal
from seal.
1. Remove cotter pin and pinion flange out.
8. Remove and discard gasket between carrier
housing and axle housing.
2. Remove pinion flange and parking brake drum.
9. Mark the bearing caps and differential housing
3. Place carrier in press and remove pinion from
(Figure 14) to aid la proper alignment during
carrier. Spacer and shims will be removed
reassembly; then remove the lock-plazas,
along with pinion.
securing capscrews, cotter pins and the
retaining bearing caps.
NOTE
Do not lose or damage shims a these
10. Refer to Figure S and remove the differential
may be used upon reinstallation,
case assembly along with the adjusting nuts,
providing carrier housing is not
bearings and bearing cups.
replaced.
4. If pinion shaft front bearing must be replaced,
remove with suitable puller.
5. To remove rear pinion shaft bearing from carrier,
use brass drift and tap out with hammer. Oil
seal will also be removed at
Figure 15. Differential Carrier and Assembly
3-143
|
|
Privacy Statement - Press Release - Copyright Information. - Contact Us |
