 |
|||
|
|
|||
|
Page Title:
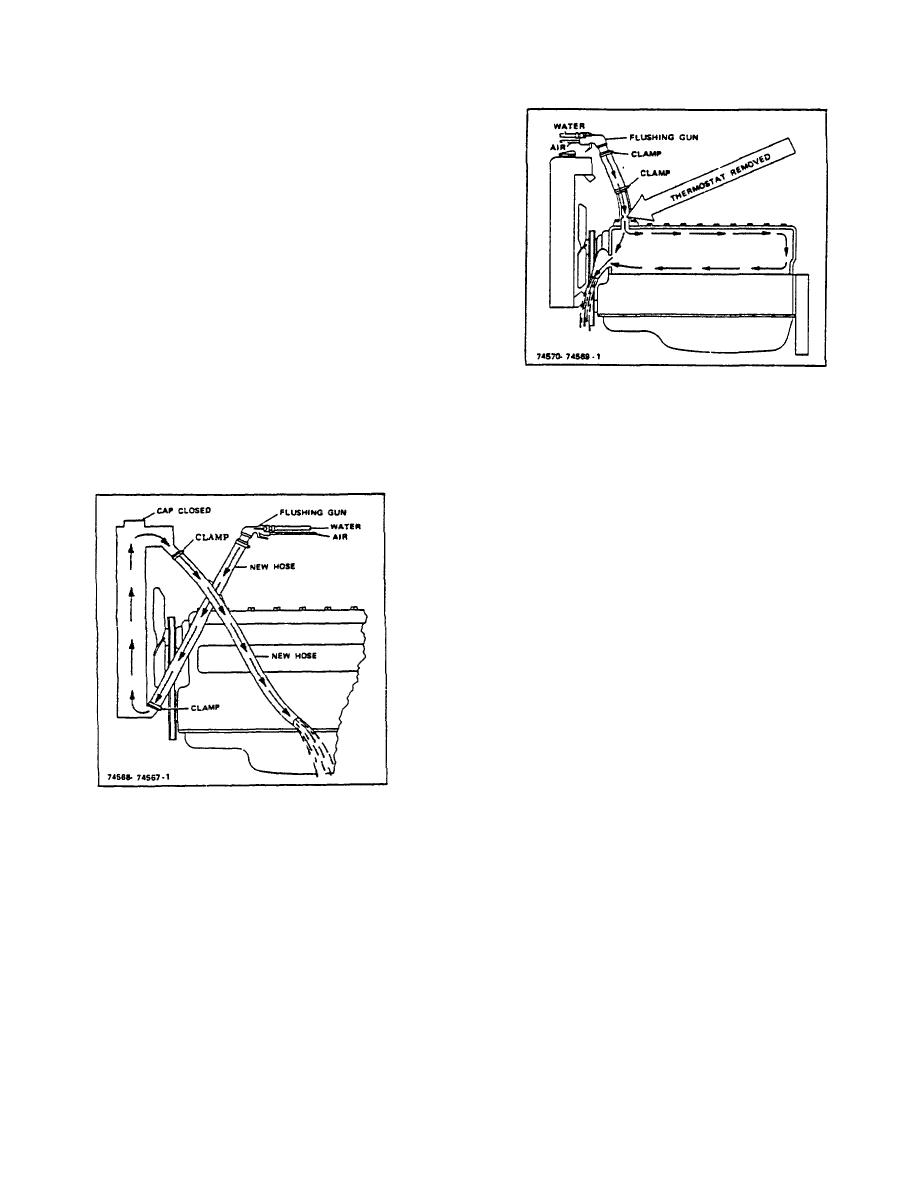
Figure 3-3. Reverse Flushing Radiator |
|
||
| ||||||||||
|
|
 TM 10-3930-644-14&P
NOTE
It is not necessary to remove the
radiator to perform reverse flushing.
Simply disconnect the upper and
lower radiator hoses and proceed as
follows.
When the clogging is caused by debris or other similar
foreign material it usually is deposited at the top of the
tubes.
1. Radiator Reverse Flush Proceed as follows (see
Figure 3-3) :
a. Disconnect the hoses at the engine.
Figure 3-4. Reverse Flushing Engine a. Remove the
b. Put radiator cap on tight.
thermostat.
c. Clamp the flushing gun in the lower hose
b. Clamp the flushing gun in the upper hose.
with a hose clamp.
c. Partly close the water pump opening to fill
d. Turn on the water and let it fill the radiator.
the engine jacket with water before applying air
pressure.
d. Follow the same procedure outlined above
for the radiator by alternately filling the water jacket with
water and blowing it out with air pressure (6 lbs. max.)
until the flushing stream is clear.
To clean the cooling fins, It is best to direct an air blast
carrying a grease solvent, such as oleum spirits or
carbon tetrachloride, directed at the back side of the
core and passing through to the front or engine side.
CAUTION
Never use gasoline, fuel oil
or
kerosene to clean the radiator.
WARNING
Always provide adequate ventilation
of the working area during this
Figure 3-3. Reverse Flushing Radiator
operation to avoid possible toxic
effects of the cleaning spray.
e. Apply air pressure (6 lbs.
max) gradually, to
avoid radiator damage.
3. For regular periodic service of radiator cooling
fins, simply direct a dry air blast against the rear
f. Shut off the air, again fill the radiator with water
of the radiator core to dislodge dust or lint which
and apply air pressure--repeat until the flushing
may have accumulated due to dusty operating
stream runs out clear.
conditions.
g. Clean and inspect radiator cap.
4. The "oil clutch" and "Power Shift" transmission
oil cooler is an integral part of the lower tank of
2. Engine Water Jacket Reverse Flush
the radiator. To properly clean the oil cooler,
Proceed as follows (see Figure 3-4) :
flush tank with an acceptable highly volatile
cleaning solvent and blow out with compressed
air.
R-155-1
3-110
|
|
Privacy Statement - Press Release - Copyright Information. - Contact Us |
