 |
|||
|
|
|||
|
|
|||
| ||||||||||
|
|
 TM 10-3930-634-34
(k) Install the injector control lever and tube
f. Installation.
(1) Check tomakesure thetops of thepistons are
clean and free from foreign material.
(2) Check to make sure that each push rod is
threaded into the clevis until the end of the push rod
projects through the clevis. This is important since
serious engine damage will be prevented when the
crankshaft is rotated during tune up.
(3) To avoid damage to water and oil seals, check
to make sure that the gooves and the counterbores in
the top of cylinder block are clean and smooth.
(4) Install new seal rings in counterbores of water
and oil holes and a new seal in the milled groove near
the outer edge of the area covered by the cylinder
(2) Remove all gasket material from the gasket
head.
area on the oil pan.
(5) Install two guide studs in each end of the cylin-
(3) Inspect the oil pan for cracks, excessive dents,
der block bolt holes to keep from disturbing gaskets
or other damage.
and seals during cylinder head installation.
(4) Check for misalined flanges or raised surfaces
(6) Wipe bottom of cylinder head clean. Use a suit-
surrounding the bolt holes by placing the oil pan on a
able lifting device and install the cylinder head.
surface plate or other large flat surface.
(7) Lubricate head bolt threads and the under side
e. Installation.
of each bolt head with a good sealing compound and
(1) Remove all gasket material from engine block
tighten the cylinder head bolts in numerical sequence
in area contacting oil pan.
as illustrated in figure 3-90. Tighten the bolts at
(2) Affix a new gasket to oil pan.
170-180 lb-ft torque.
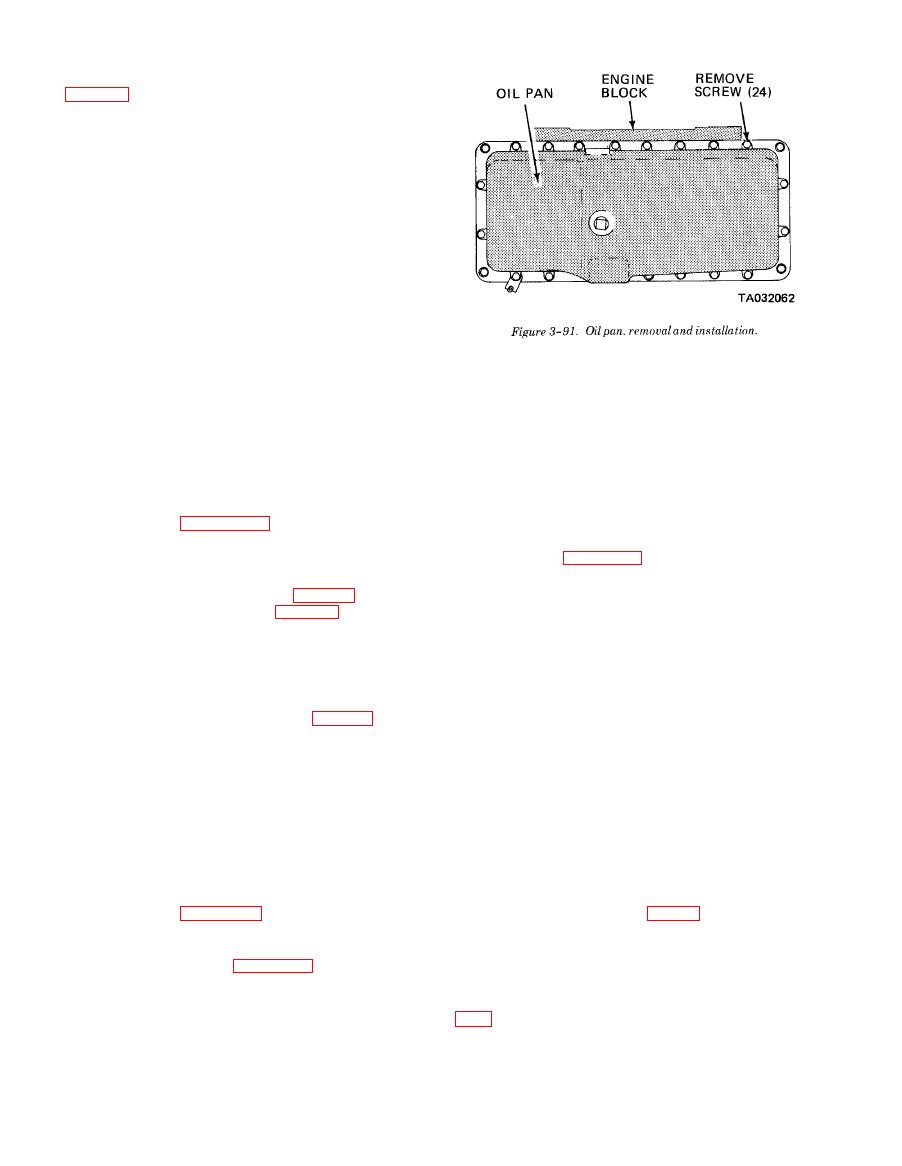
(3) Refer to figure 3-91 and reinstall the oil pan.
(8) Install the thermostat, thermostat housing
and exhaust manifold (TM 10-3930-634-12).
(4) Tighten screws evenly to prevent damage to
the gasket or springing the oil pan.
(9) Adjust the valve clearance (para 3-12).
(10) Time the fuel injectors (para 3-12).
(5) Install drain plug and tighten to 25-35 lb-ft of
(11) Service the cooling system. Start the engine
(6) Refer to the lubrication order and service en-
and check for leaks (TM 10-3930-634-12).
gine lubrication system.
(12) Operate the engine until it reaches normal
(7) Start engine and check for leaks.
operating temperature. Stop the engine and retorque
the cylinder head bolts (para (7) above).
(13) Install the rocker arm cover (para 3-16).
a. General. As the oil pump rotors revolve, a vac-
3-26. Oil Pan
uum is formed on the inlet side of the pump and oil is
drawn from the crankcase, through the oil pump
a. General. The oil pan is made of cast aluminum.
The oil pan is sealed to the engine block by a four piece
screen and inlet pipe, into the rotor compartment of
the pump. The oil pump screen filters out large foreign
gasket. It is secured to the bottom of the engine block
particles, which may be present in the oil pan, to pre-
by 24 bolts and washers. A drain plug is located in the
vent entry into the oil pump.
bottom of the oil pan for draining the engine oil, at oil
b. Removal.
change intervals or for oil pan removel.
(1) Drain engine oil and remove oil pan (para
b. Removal.
3-26).
(1) Remove drain plug and drain the engine oil.
(2) Remove four screws (1, fig. 3-93) and lock-
(2) Refer to figure 3-91 and remove the oil pan.
washers (2) and remove the oil pump screen and inlet
Take care not to `damage oil pump inlet pipe and
pipe.
creen.
c. Disassembly. Refer to figure 3-92 and disassem-
(3) Remove ring (3) and flange (4).
c. Disassembly. Disassemble the oil pump screen
ble the oil pan.
d. Cleaning and Inspection.
and inlet pipe in numerical sequence shown in figure
(1) Clean oil pan a n d a t t a c h i n g h a r d w a r e
d. Cleaning and Inspection.
t h o r o u g h l y , using cleaning solvent P-D-680 or
equivalent. Dry with compressed air.
(1) Clean all metal parts thoroughly, using clean-
|
|
Privacy Statement - Press Release - Copyright Information. - Contact Us |
