 |
|||
|
|
|||
|
Page Title:
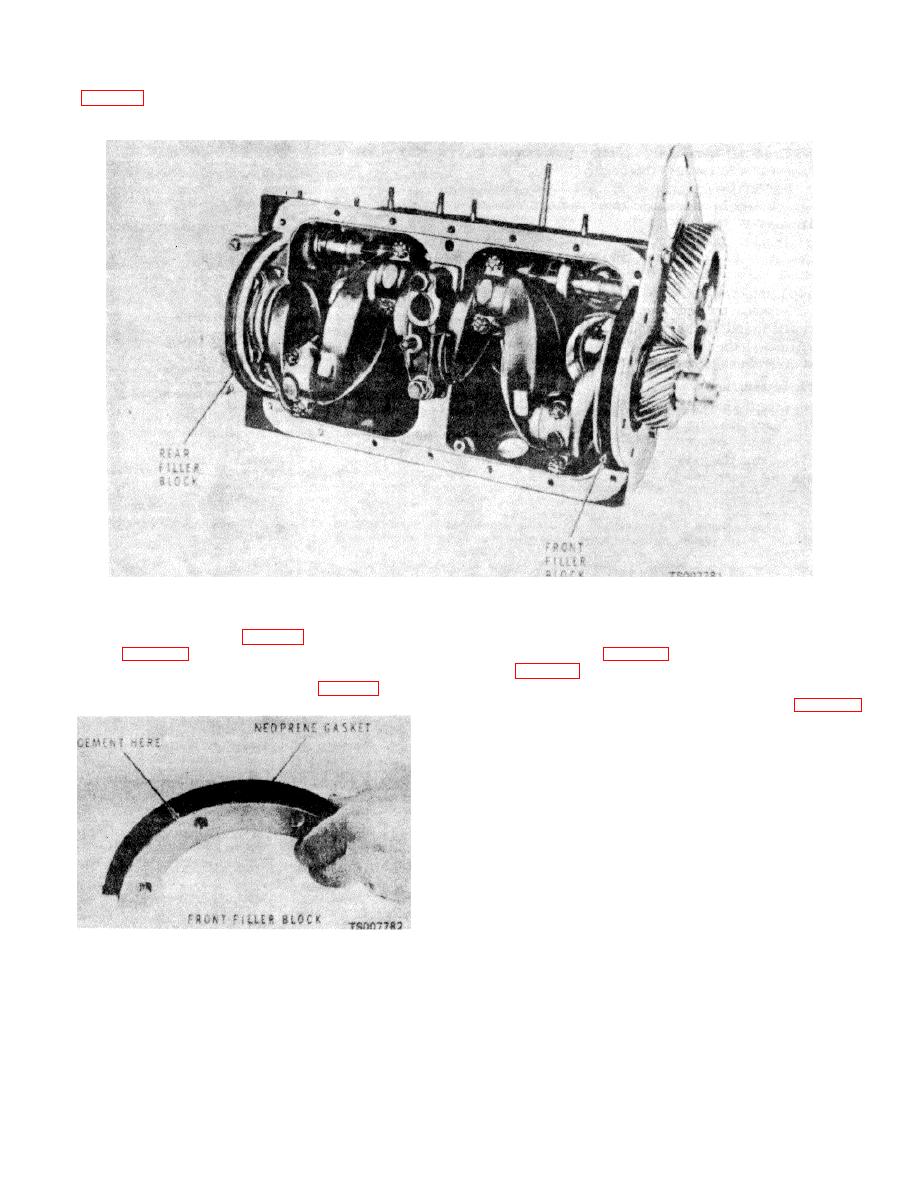
Figure 9-17. Filler Blocks Installed on Engine. |
|
||
| ||||||||||
|
|
 TM 10-3930-632-34
(29, fig. 9-26) and lockwashers (30). Tighten the
screws to 15 to 20 ft/lbs torque.
Figure 9-17. Filler Blocks Installed on Engine.
d.
e.
Install the gasket (7, fig. 9-13) on the front filler
Install the assembled gasket and filler block on
block (31, fig. 9-26) by placing a drop of nonhardening
the engine block (fig. 9-17); secure with the two screws
cement on the middle of the gasket and pressing the
(32, fig. 9-26) and lockwashers (33). Tighten the screws
gasket into the groove in the filler block (fig. 9-18).
to 15 to 20 ft/lbs torque.
f.
Position the oil pump assembly (12, fig. 9-13)
on the engine block; secure with the nut (10) and
lockwasher (11). Install the oil screen (9) on the oil pump
assembly.
g.
Flatten oil pan gasket surfaces with a block of
wood and a hammer. Position the gaskets (8) on the oil
pan (5). Install the oil pan and gaskets on the engine
block; secure with the twelve screws (3) and
lockwashers (4). Tighten the screws to 15 to 20 ft/lbs
torque.
Figure 9-18. Installing Neoprene Gasket
on Front Filler Block.
9-12
|
|
Privacy Statement - Press Release - Copyright Information. - Contact Us |
