 |
|||
|
|
|||
|
Page Title:
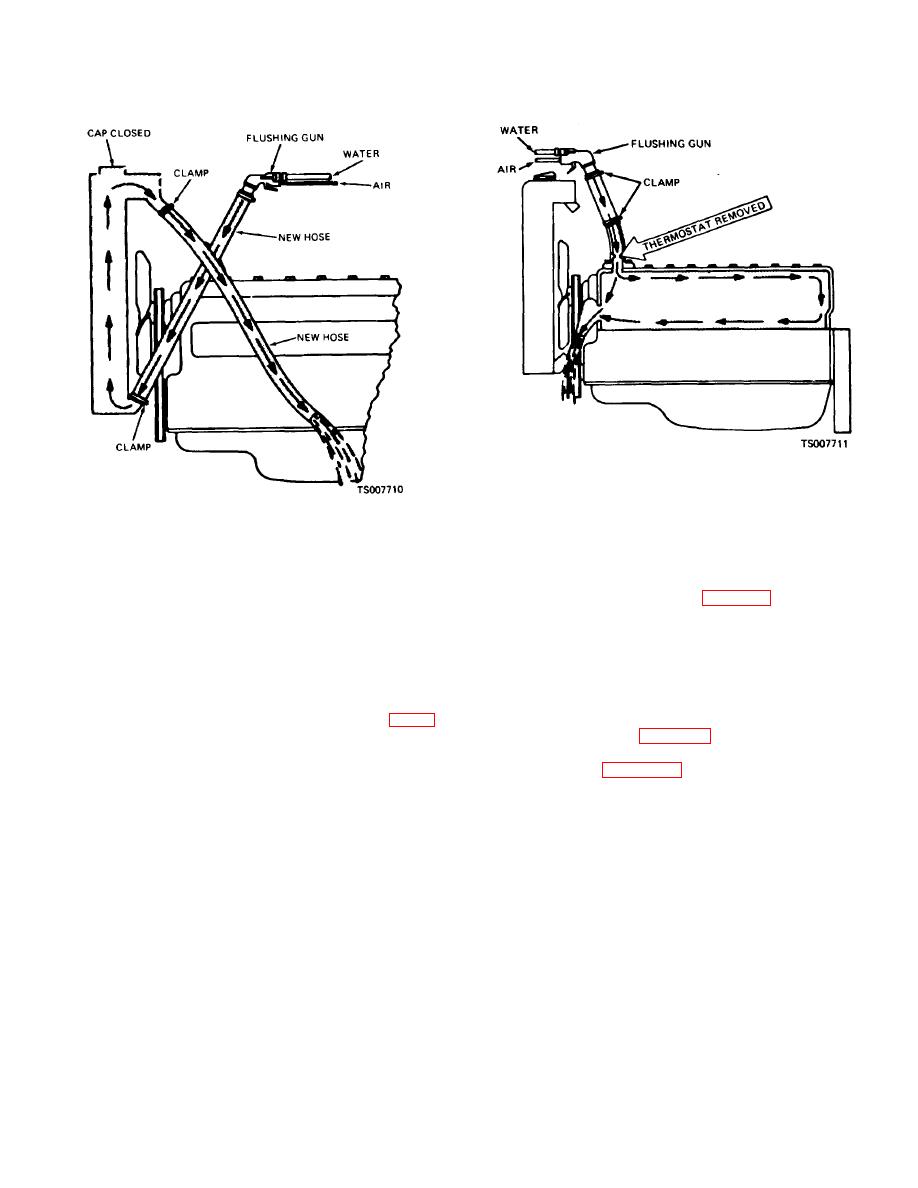
Figure 4-37. Reverse Flushing the Radiator |
|
||
| ||||||||||
|
|
 TM 10-3930-632-12
Figure 4-38. Reverse Flushing the Engine Block
(g)
Install the thermostat in the
Figure 4-37. Reverse Flushing the Radiator
thermostat housing; install the bypass hose; install the
upper and lower hoses on the radiator and water pump;
secure with clamps. Close the engine and radiator drain
(d) Remove the bypass hose from
cocks. In accordance with current directives, fill the
the elbow on the thermostat housing and water pump.
cooling system with antifreeze (table 3-2) containing a
Install a plug in the elbow on the thermostat housing.
rust inhibitor or water and rust inhibitor.
(e)
Remove the nuts and
b. Removal.
lockwashers that secure the thermostat housing to the
(1) Remove the overhead guard (para 4-
cylinder head; remove the thermostat housing,
16) and radiator cover.
thermostat and adapter.
Reinstall the thermostat
(2) Drain the radiator by opening the drain
housing; secure the nuts.
cock and removing the radiator cap.
(f) Connect the flushing gun to the
(3) Disconnect the transmission cooling
upper hose on the thermostat housing as shown in figure
lines from the radiator (para 4-82).
4-38. Completely fill the engine water jacket with water.
(4) Remove the radiator and associated
Hold a hand over the water pump outlet to be sure the
parts as shown in figure 4-36.
water jacket is completely full. Shut off the water
c. Inspection, and Testing.
supply. Blow the water out of the water jacket with air.
(1) Inspect the radiator for cracks, leaks,
Repeat this procedure until the flushing stream runs
clogged tubes, dents, and signs of leaking. Carefully
clean. Disconnect the flushing gun.
inspect the solder joints between the tank and core.
4-52
|
|
Privacy Statement - Press Release - Copyright Information. - Contact Us |
