 |
|||
|
|
|||
|
Page Title:
Cleaning. Inspection and Repair. |
|
||
| ||||||||||
|
|
 TM 10-3930-631-34
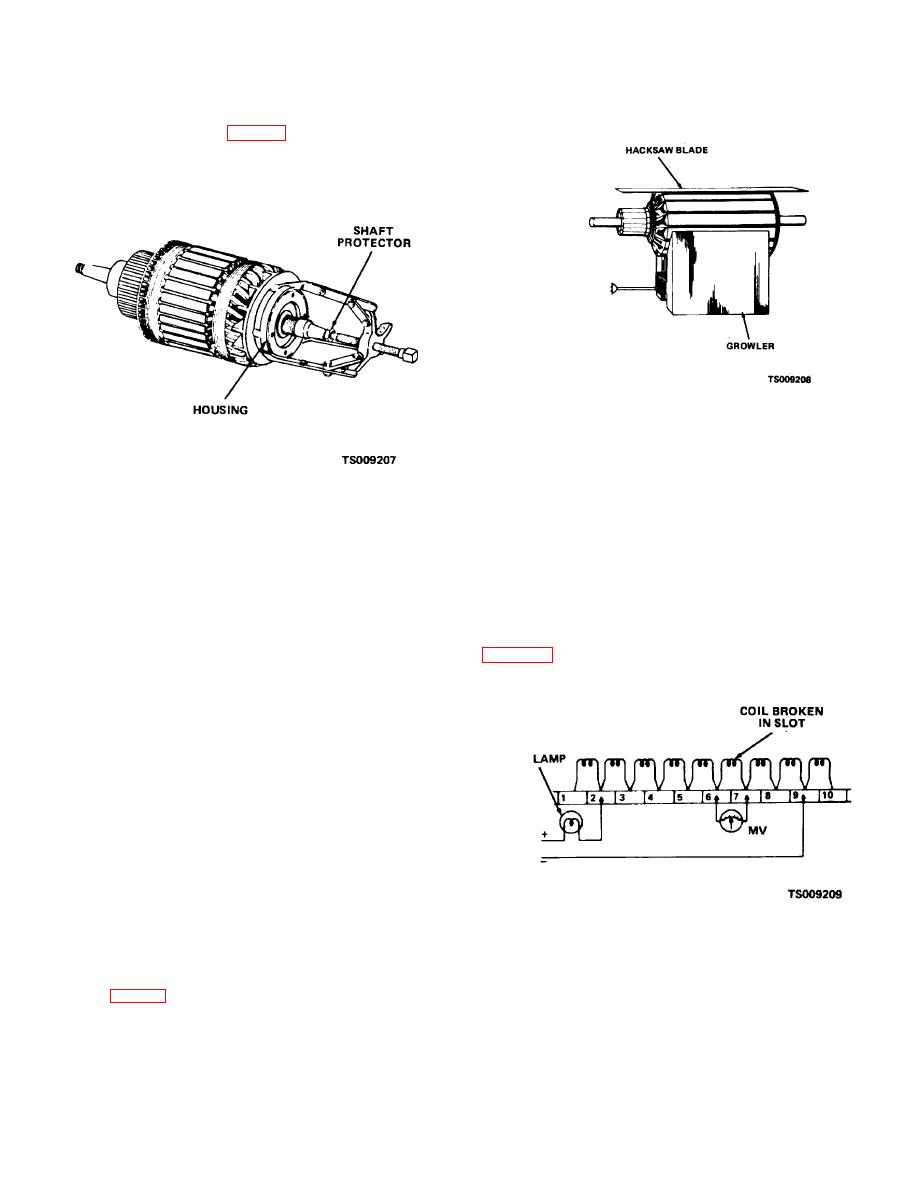
protect surface. Place armature on blocks to protect it
from damage.
(5) Use a puller (fig. 8-4), remove housing (4)
from armature shaft. Press seal (5) and bearing (6) from
housing.
Figure 8-5. Testing armature for shorts.
(a) Hold a steel strip or hacksaw blade on
armature core and rotate armature.
(b) If strip or blade vibrates armature is shorted
in area below vibrating blade.
Figure 8-4. Removing bearing housing.
(c) Clean out slots in armature and check again
on growler.
6) Remove retaining ring (7) and remove fan
(d) Shorts at the crossover of coils at core end
(8) and key (9) from armature shaft.
can be eliminated by bending the wire slightly and
(7) Remove screws (12) and remove housing
insulating exposed base wire.
(28) with attached brush rocker arm (26), brush holders
(e) If shorts cannot be eliminated, replace
and bearing (27). Pull housing out far enough, tag and
armature.
disconnect leads (13, 14 and 15) from brush holders and
(5) Place the armature in blocks and connect a
windings.
source of direct current to the commutator as shown in
(8) Remove rocker arm (26) from housing and
remove brush springs and brush holders.
(9) Press bearing (27) from housing.
(10)If not removed, remove nuts, washers,
insulation and stud assemblies (10 and 11).
(11)Remove pole shoe screws (29). Count and
remove shims (31). Remove pole shoes and field
winding (32).
CAUTION
Handle field windings carefully so as not to
damage insulation.
d. Cleaning. Inspection and Repair.
(1) Clean all parts except field windings and
armature in cleaning compound solvent (Fed. Spec. P-
D-680) and dry thoroughly.
(2) Wipe armature and windings with a cloth
Figure 8-6. Check for open coils.
saturated in solvent. Do not soak, dip or wash.
(3) Inspect bearings for wear and damage.
Replace unserviceable bearings.
(4) Check armature for shorts by placing it on a
growler (fig. 8-5).
8-4
|
|
Privacy Statement - Press Release - Copyright Information. - Contact Us |
