 |
|||
|
|
|||
|
Page Title:
Fuel Filter |
|
||
| ||||||||||
|
|
 TM 10-3930-630-12
(6) Swing clamp (10) down into position and
pump (21) inlet and outlet. Install fuel filter on fuel
secure bowl by tightening nut (11).
pump.
(7) Open fuel tank shutoff cock (46) and
(2) Use a new gasket (22) and install fuel
operate engine and check fuel filter for leaks.
pump and filter on engine. Secure fuel pump with
(8) Shut off engine and close side panel
screws (19) and lockwashers (20).
c. Removal
(3) Connect hose (17) to fuel pump. Connect
fuel hose (6) to fuel filter
(1) Refer to paragraph 4-60 and remove fuel
(4) Open fuel shutoff cock (46). Operate
filter from fuel pump.
engine and check fuel pump operation. Test outlet
(2) Remove fittings (7 and 8, fig. 4-45) from
pressure (b above) if necessary.
fuel filter (52).
d. Installation.
(5) Shut off engine and close left side panel.
(1) Install fittings (7 and 8, fig. 4-45) in fuel
4-61. Fuel Filter
filter (52).
a. General. The fuel filter is the bowl and screen
(2) Refer to paragraph 4.60 and install fuel
filter and fuel pump on engine.
type and is mounted at the fuel pump inlet. Fuel from
the fuel tank is drawn through the filter before being
4-62.
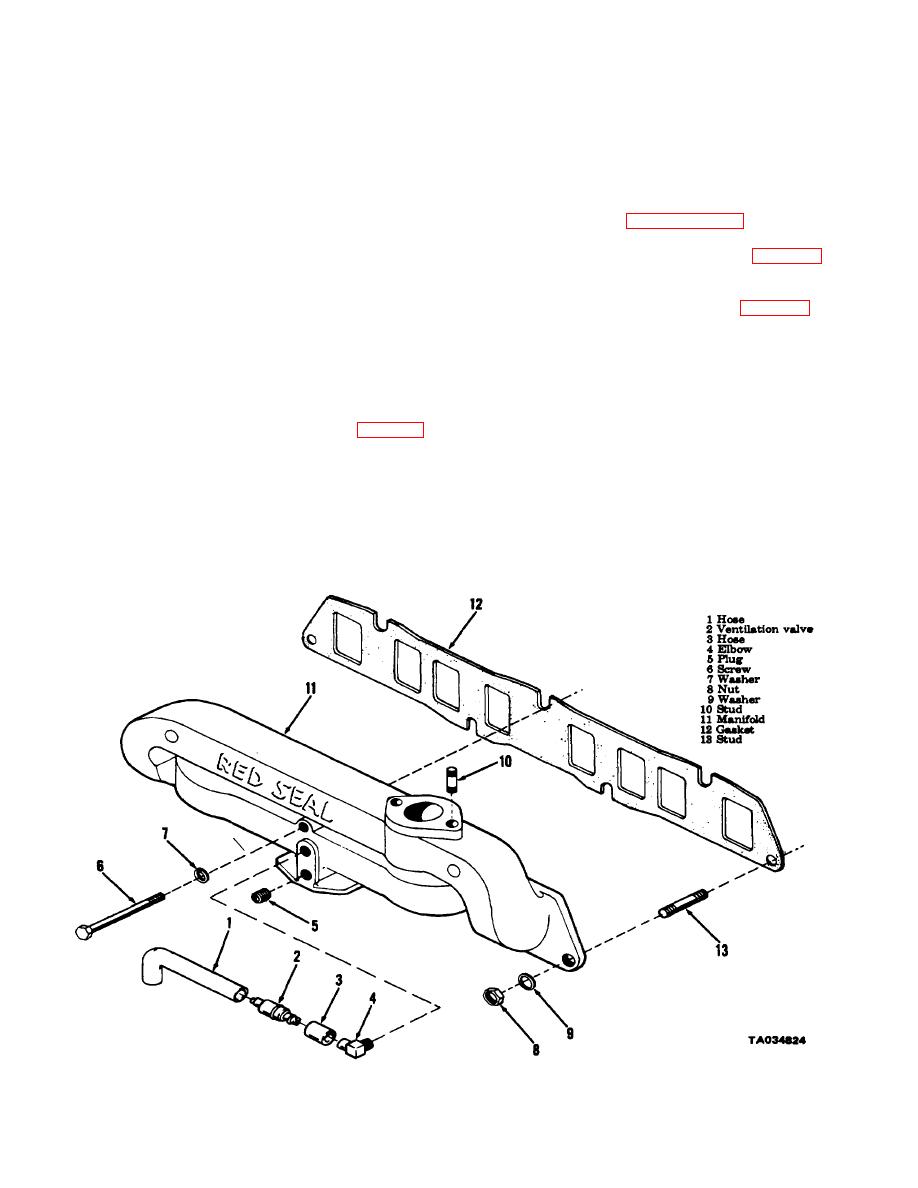
Crankcase Ventilation
pumped to the carburetor.
b. Service
(1) Close fuel tank shutoff cock (46, fig. 4-45).
(2) Open left side panel.
valve is connected to an elbow in the manifold. A hose
(3) Loosen nut (11) and remove bowl (12) and
connects the valve to a pipe in the valve chamber
gasket (13) from cover (15). Remove screen (14).
cover.
b. Removal.
(4) Inspect screen and if damaged or clogged,
replace screen.
(1) Open left side panel
(5) Install screen (14) in cover (15). Use a
(2) Disconnect hose (1, fig.
449) from
new gasket (13) and install bowl (12) on cover.
chamber cover and valve (2).
.
Figure 4-49. Manifold, exploded view
4-58
|
|
Privacy Statement - Press Release - Copyright Information. - Contact Us |
