 |
|||
|
|
|||
|
|
|||
| ||||||||||
|
|
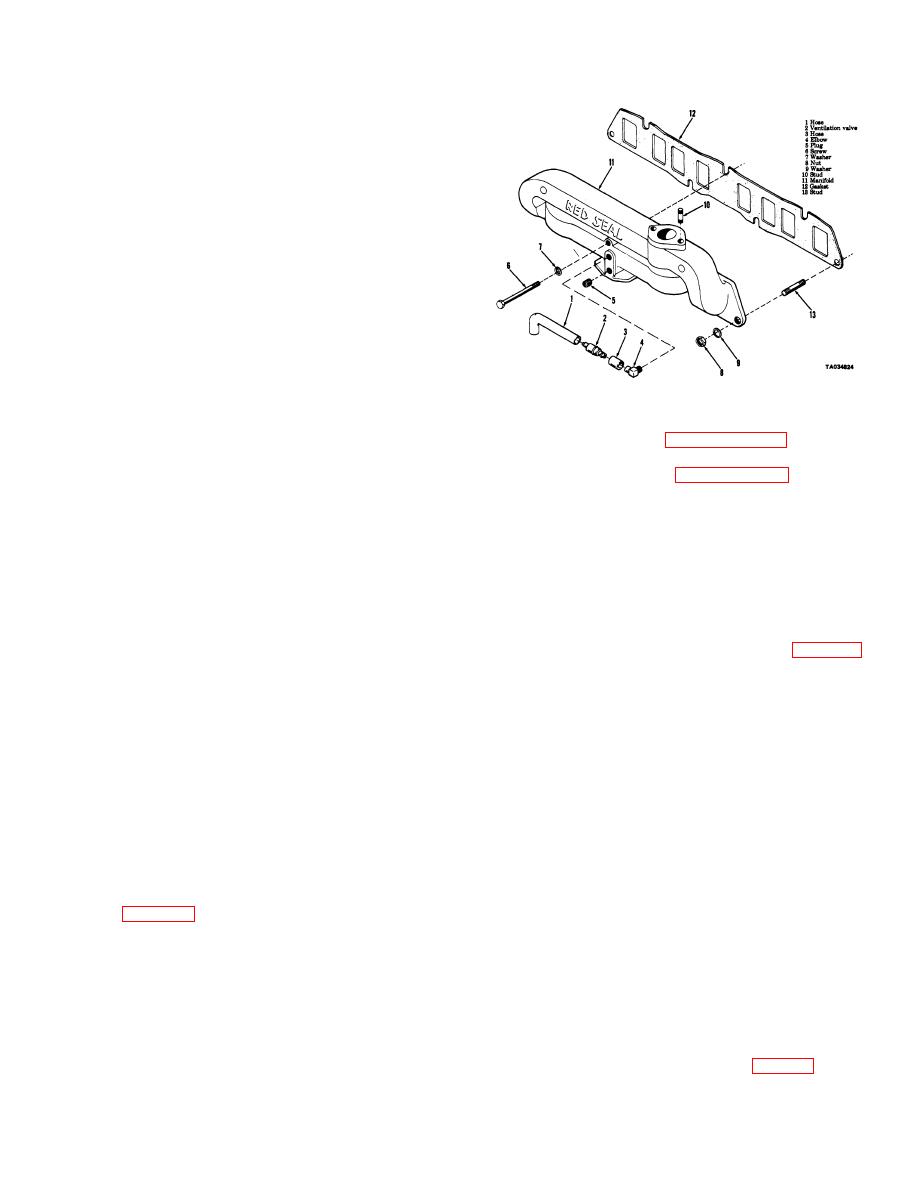 TM 10-3930-630-12
(5)Remove nuts (26) and lockwashers (27) and
remove carburetor (32) and governor (28) from
manifold.
(6) Lift governor, gaskets (29) and spacer (30)
from carburetor. Remove elbow (7) from carburetor.
(7) Remove studs (31) from carburetor.
d. Installation.
(1) Install studs (31, fig. 445) in carburetor
(32).
(2) Install new gaskets (29), spacer (30) and
governor (28) on carburetor.
(3) Install assembled carburetor and governor
on manifold, using a new gasket. Carburetor studs
should extend through manifold flange.
(4) Secure carburetor in position with nuts (26)
and lockwashers (27).
(5) Install elbow (7) in carburetor and connect
fuel hose (17) to elbow.
Figure 4-48. Governor adjustment
(6) Slide air inlet hose on carburetor and
tighten clamp.
(7) Connect throttle cable (fig. 447) and choke
governor.
cable to carburetor levers.
(8) Operate engine and adjust carburetor (b
governor.
above).
(9) Close left side panel
4-60.
Fuel Pump
4-59.
Governor
a. General. The mechanically operated fuel pump
is located on the left front side of the engine below the
a. General The velocity type governor is mounted
air cleaner.
between the carburetor and manifold. Operation of the
b. Pressure Test.
governor prevents the engine speed from exceeding
(1) Open left side panel
2450 rpm. Air mixed with gas flows through the
(2) Disconnect fuel outlet hose (17, fig. 4-45)
governor throat. Velocity of the air creates a pressure
from fuel pump. Use appropriate fittings and connect a
above the governor valve. A regulating spring is
0-15 psi pressure gage between fuel pump and
attached to the throttle valve and tends to keep the
carburetor.
valve open. When the pressure above the valve
(3) Start engine and allow to reach operating
exceeds the force exerted by the spring the valve will
temperature. Check pressure on gage at idle and
move toward the closed position. The closing action of
maximum speed. At 1800 rpm gage should register
the valve will exactly balance he spring and when this
between 1 to 214 psi.
occurs governing action takes place and maximum
(4) If pressure is not within limits described
speed is fixed at this point. An adjusting screw varies
above, replace fuel pump.
spring tension and thereby regulates top speed.
(5) Remove gage and connect hose (17) to
b. Adjustment.
fuel pump. Stop engine and close side panel.
(1) Start engine and allow engine to reach
c. Removal
operating temperature.
(1) Close fuel tank shutoff cock (46, fig. 445).
(2) Open left side panel
(2) Open left side panel.
(3) Adjust accelerator and choke cable
(3) Disconnect fuel hose (6) from fuel filter
operation (para 4-58) if necessary.
(52).
(4) Depress accelerator and check maximum
(4) Disconnect hose (17) from fuel pump (21).
speed of engine. Speed should be 2350 to 2450 rpm
Remove screws (19) and lockwashers (20) and remove
(5) If engine speed is not within the above
fuel pump (21) from side of engine. Remove gasket
limits, adjust governor with the adjusting screw (fig. 4-
(22).
48). The screw is located on the left bottom side of the
(5) Remove fuel filter (52) and fittings from
governor. Turn screw clockwise to increase engine
fuel pump.
speed and counterclockwise to decrease engine speed.
d Installation.
(6) Stop engine and close left side panel
(1) Install fittings (8, 16, and 18, fig. 4-45) in fuel
.
4-57
|
|
Privacy Statement - Press Release - Copyright Information. - Contact Us |
