 |
|||
|
|
|||
|
|
|||
| ||||||||||
|
|
 TM 10-3930-630-12
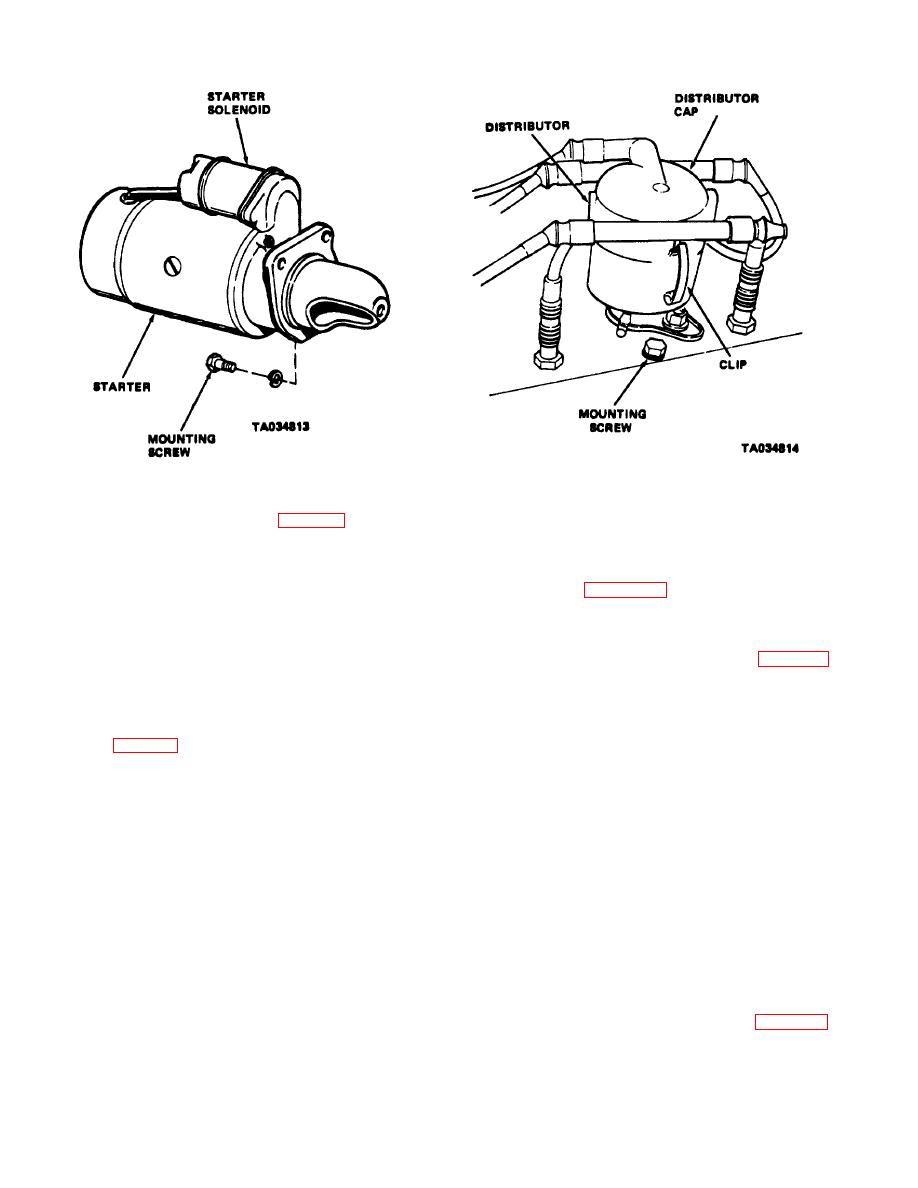
Figure 4-39. Distributor, installed view.
Figure 4-38. Starter, removal and installation
(3) Inspect interior of cap for burned or
(4) Support starter (fig. 4-38) and remove
worn contacts, carbon tracks and cracks.
Wipe
screws and lockwashers securing starter to flywheel
distributor cap with a clean cloth.
housing.
(4) Inspect breaker points for pitting and
(5) Carefully pull starter from housing and
wear. Refer to figure 4-40 and check breaker point gap.
remove from truck.
d. Installation.
Rotate cam to bring breaker lever to high point on cam.
Insert feeler gage between breaker points Gap should
(1) Lift starter (fig. 4-88) into position on
be 0.020 inches (0.50 mm) between points. If points
flywheel housing with starter drive in line with flywheel
require adjustment, loosen lockscrew (fig. 4-40) and
ring gear.
place screwdriver in adjusting slot. Move breaker lever
(2) Install screws and lockwashers to
until correct gap is obtained. Tighten lockscrew to hold
attach starter to flywheel housing. Tighten screws
adjustment. Correct dwell angle is 66 to 72.
securely.
(5) Apply a light coat of grease (GAA) to
(3) Check tap and connect wires to starter
distributor cam. Place a few drops of oil (OE/HDO) in
solenoid (fig. 4-38).
oil cup.
4-53.
Distributor
(6) Install dust seal, rotor and distributor
cap and secure cap with clamps
a. General. The distributor is mounted on the
(7) Remove prop and lower seat and
support into position above engine.
top of the cylinder head. High tension wires connect the
c. Removal
distributor to the spark plugs and coil A shaft, driven by
(1) Lift and tip seat forward and prop in
the engine, extends up to a coupling and drives the
open position.
distributor.
b. Service.
(2) Disconnect spark plug wires (2, fig. 4-
41) from distributor cap. Disconnect coil wire (1) from
(1) Lift and tip seat forward and prop in an
distributor cap. Disconnect primary lead from coil
open position.
(3) Remove screw (12) and lockwasher
(2) Disengage clips at sides of distributor
(18) and lift distributor, with clamp (14) attached, from
(fig. 4-89) and lift cap from distributor. Remove rotor
engine.
and dust seal
d. Disassembly.
(1) Disengage clamps (2, fig. 4-42) and
remove distributor cap (3) from distributor.
4-47
|
|
Privacy Statement - Press Release - Copyright Information. - Contact Us |
