 |
|||
|
|
|||
|
Page Title:
Inspecting and Servicing the Equipment. |
|
||
| ||||||||||
|
|
 TM10-3930-628-12
CHAPTER 2
OPERATING INSTRUCTIONS
d. Remove any preservative compound that
2-1.
Inspecting and Servicing the Equipment.
has been sprayed on metal surfaces with cleaning
a. When a truck is received by the using
compound, solvent (Fed. Spec. P-D-680) and dry
organization it must be serviced to prepare it for
thoroughly.
operation. The services required are described in
Note. Preservative compound is not a lubricant. Take
b. Carefully inspect the truck for any signs of
special care to completely remove the compound from all
dents or damage that may have occurred during
wearing surfaces.
shipment. Pay particular attention to sheet metal panels
e. Fill battery with electrolyte to five-eighths of
and controls and instruments.
an inch above the plates. Check specific gravity of
c. Remove tape, paper and other packing
electrolyte as prescribed in TM 9-6140-200-15.
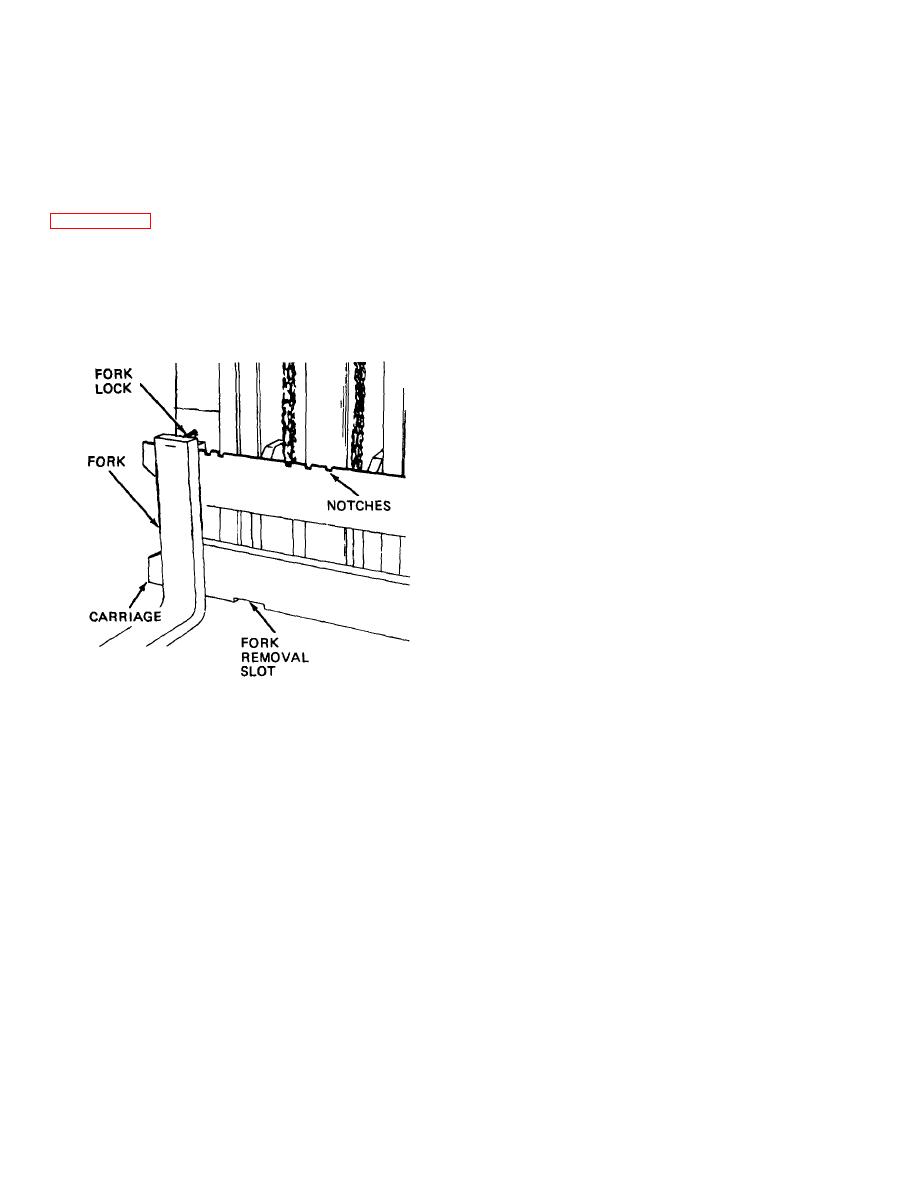
materials. Remove forks from truck by removing
Warning: When servicing battery, do not
smoke or use flame in the vicinity. Batteries generate
hydrogen, a highly explosive gas. f. Lubricate the truck in
accordance with the current lubrication order.
g. Fill hydraulic reservoir with proper grade of
oil. Refer to current lubrication order.
2-2.
Installation
of
Separately
Packed
Components
a. Components. The only components not
already installed are the forks and the fire extinguisher.
b. Fire Extinguisher. Remove separately
packed fire extinguisher and install in bracket on
instrument panel. Be-certain bracket clamp locks
properly to secure fire extinguisher in position.
INSTALLATION
1. RELEASE FORK LOCK BY TURNING
POINT UP.
2. SLIDE FORK IN LINE WITH SLOT ON
CARRIAGE. LIFT FRONT OF FORK UP
AND SLIDE INTO POSITION.
3. TURN POINT OF FORK LOCK DOWN TO
LOCK FORK IN NOTCH ON CARRIAGE.
REMOVAL
1. TURN POINT UP TO RELEASE FORK
LOCK.
2. SLIDE FORK IN LINE WITH SLOT ON
CARRIAGE. LIFT FRONT OF FORK UP
AND REMOVE FROM CARRIAGE.
ADJUSTMENT
1. RELEASE LOCK.
2. SLIDE FORK IN LINE WITH NOTCH AND
LOCK IN POSITION.
ME 3930-628-12/2-1
Figure 2-1. Removing, installing, or adjusting carriage
forks.
2-1
|
|
Privacy Statement - Press Release - Copyright Information. - Contact Us |