 |
|||
|
|
|||
|
Page Title:
Figure 3-18. Checking crankshaft end play. |
|
||
| ||||||||||
|
|
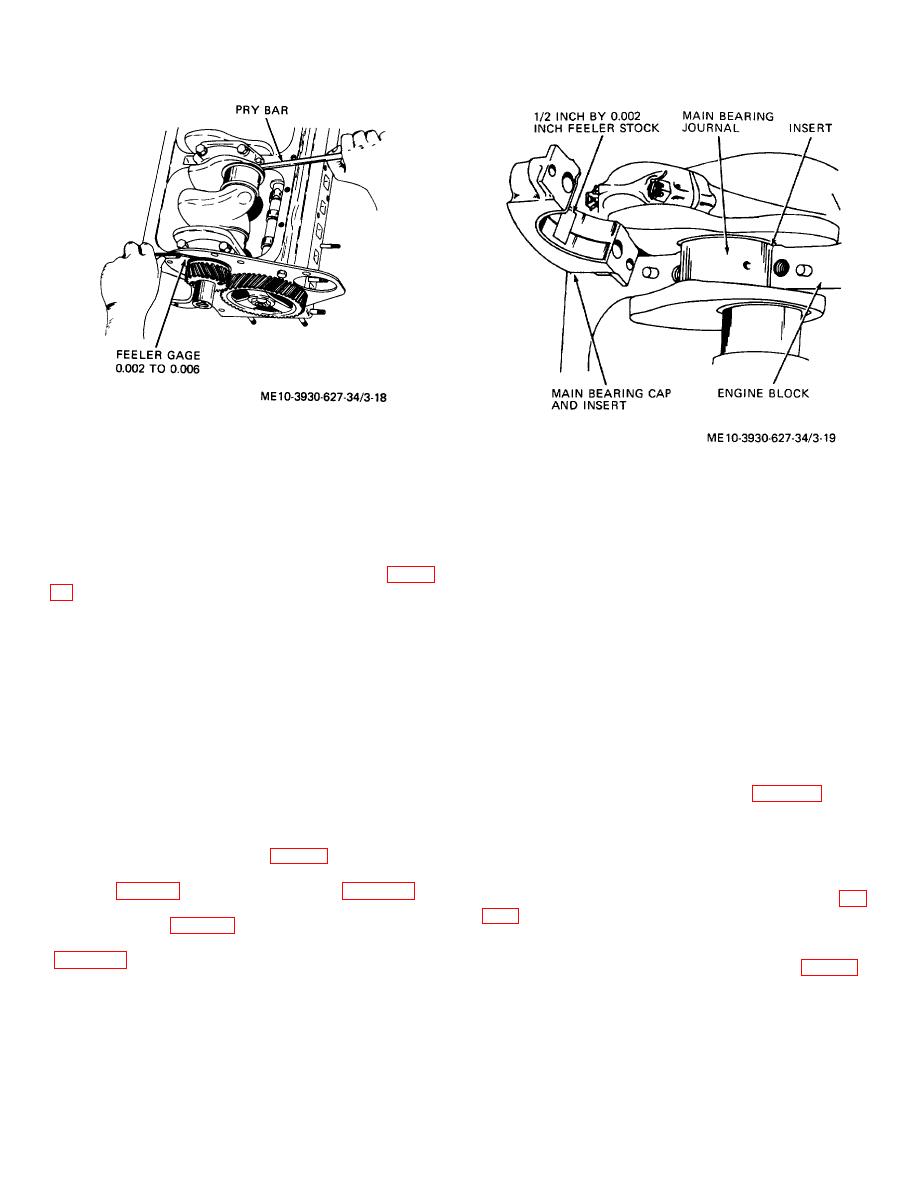 Figure 3-18. Checking crankshaft end play.
b. Clearance.
The crankshaft bearing clearance
Figure 3-19. Checking main bearing fit.
should be checked as follows after new bearing halves
have been installed or when engine performance
(6) Remove crankshaft and remove upper
(crankshaft knock or low oil pressure) indicates need for
bearing halves.
such a check.
d. Cleaning. Clean all parts with solvent and dry them
(1) Remove bearing cap and place a piece of
thoroughly. Use a soft wire probe to clean all oil
0.002 by 1/2 by 1 inch shim stock in bearing cap (fig. 3-
passages.
e. Inspection and Repair of Crankshaft.
(2) Install bearing cap and tighten to 85 to 95
(1) Inspect crankshaft journals and bearings for
foot-pounds torque. If crankshaft rotates with noticeable
excessive wear, taper, out-of-round, with a micrometer,
drag, clearance is correct.
and visually for scoring and other damage.
See
(3) Clearance may be checked by plastigage
tabulated data for minimum allowances for bearings and
method if plastigage and special measuring scale are
journals.
available.
If this method is used, do not rotate
(2) Inspect crankshaft gear for cracks or tooth
crankshaft with plastigage in place.
damage. Replace gear if defective.
Note.
(3) When installing new or reconditioned
Be sure center main thrust bearing
crankshaft, also install new main and connecting rod
lower half is flush with upper half on
bearings.
thrust side, then check crankshaft
(4) Check crankshaft end play (fig. 3-18) with
end play. End play should be 0.002
thrust plate, gear and pulley in place and bolt torqued.
to 0.006 inch.
f. Installation of Crankshaft. Reverse procedure in
c. Removal of Crankshaft
step c above, observing the following:
(1) Remove the engine. (para 2-6 a.)
(1) Install oil guard before installing crankshaft.
(2) Remove engine flywheel and flywheel
(2) Be sure center main bearing lower half is flush
housing. (para 3-8.) Remove the oil pump. (para 3-10.)
with upper half on thrust side, then check end play (fig.
(3) Remove timing gear cover, cover plate and
crankshaft gear. (para 3-7.)
(3) Install safety wire on center main bearing cap
(4) Remove the pistons from the engine block.
screws after pump is installed.
(para 3-12 b.)
(4) Time crankshaft and camshaft gears (fig. 3-6).
(5) Mark and remove crankshaft bearing caps
(5) Check bearing clearance, b. above.
(step a. (2) above) and remove bearings from caps.
3-14
|
|
Privacy Statement - Press Release - Copyright Information. - Contact Us |
