 |
|||
|
|
|||
|
|
|||
| ||||||||||
|
|
 (2) Connect a voltmeter across the terminals
of the battery, and note the reading. Pull the high
tension cable from the ignition coil, crank the engine
with the starter, and note the reading on the voltmeter.
If the difference between the two is more than 4 volts or
the second reading is less than 8 volts, replace the
battery.
c. Battery Removal.
(1)
Loosen the nuts (fig.
that secure the battery cables to the battery posts;
remove the cables.
(2) Remove the two wing nuts from hold-
down studs and remove battery hold-down. Remove the
battery.
d. Cleaning and Inspection.
(1) Clean the battery tray and hold-down by
flushing with a solution of baking soda and water. Flush
parts until bubbling stops when new solution is applied.
(2) Inspect the battery for loose posts, cracks,
evidence of leaks, or other damage.
e. Installation. Install battery by reversing the
removal procedure.
(1) Loosen the nuts that secure the cables to
the battery posts; disconnect the cables. Remove the
cable clamp that secures the cables to the truck frame.
(2) Remove the starting motor mounting bolt
and lockwasher that secure the negative cable to the
frame of the truck; remove the cable.
(3) Remove the nut and washer that secure
the positive cable to the starter solenoid; remove the
cable.
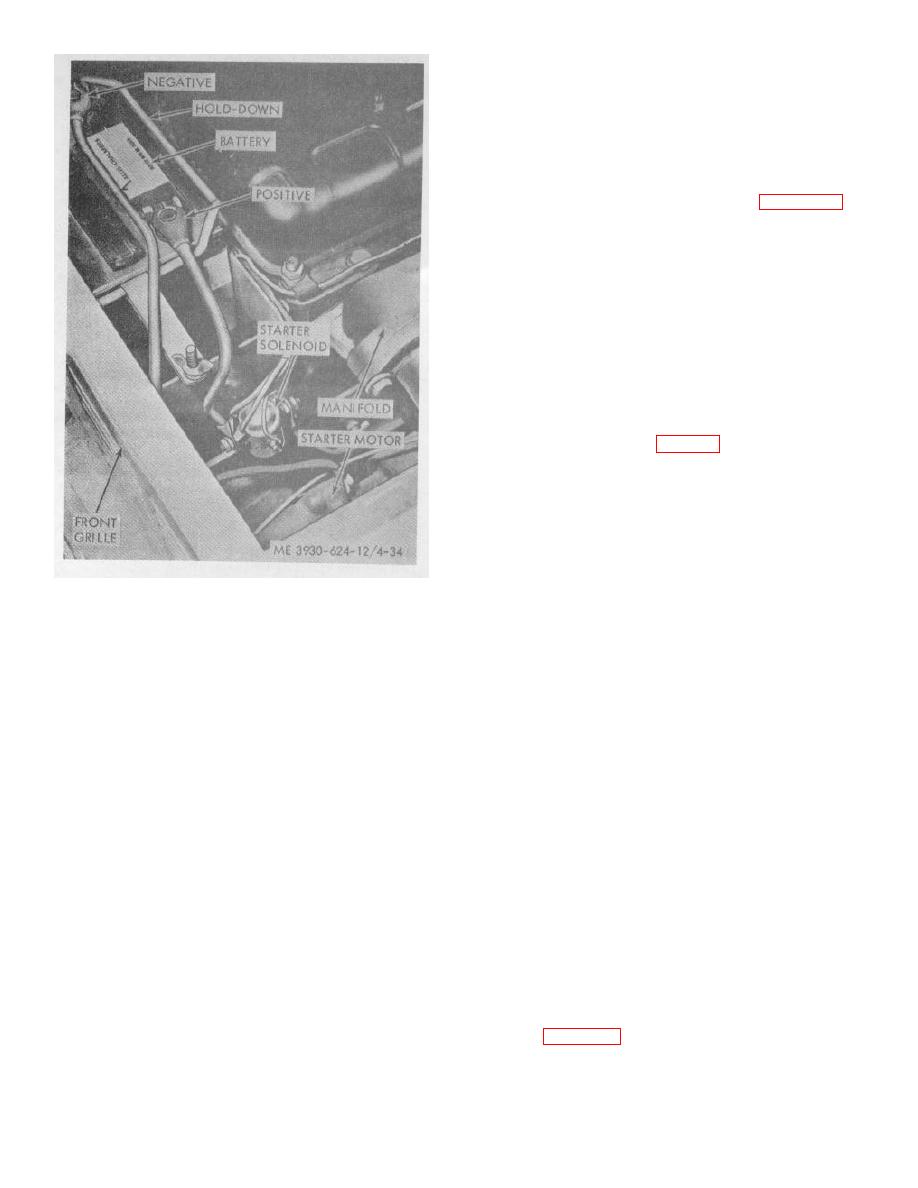
Figure 4-34. Battery location.
g. Cleaning and Inspection.
(1) Clean the cables with a rag dampened
(2) Remove dirt and grease accumulated on
with a cleaning solvent. Clean cable clamps and lugs
the battery with a clean cloth.
with a wire brush.
(3) Pour a solution of baking soda and water
(2) Inspect the cables for cracked insulation,
on the battery to neutralize any acid present. Continue
breaks, or other damage.
to pour until the solution no longer bubbles when it
(3) Inspect cable clamps and lugs for
contacts the battery.
corrosion, distortion, poor connections to cables, or
Caution: Remove the negative cable first.
other damage.
When installing cables install the negative cable
(4) Replace the cables if defective.
last.
h. Cable Installation. Install cables by using the
(4) Loosen the nuts that secure the battery
direct reversal of removal procedure.
cables to the battery posts; remove the cables. Clean
all corrosion from the cable clamps and posts with a
4-40. Instrument Panel
wire brush. Reattach the cables; tighten the nuts.
a. Removal and Disassembly.
(5) Lightly coat the battery posts and cable
Warning: Disconnect the negative battery
clamps with. petroleum jelly.
cable from the battery before disconnecting
b. Battery Testing.
electrical leads from the controls and instruments
(1) Test the state of the electrolyte using a
on the instrument panel.
hydrometer. The specific gravity of the electrolyte at
(1) From beneath the right hand side of the
75 F should be 1.225 minimum for normal temperature
instrument panel, disconnect the male line connector.
operation, or 1.265 minimum for cold temperature
(2) At the front of the panel, insert a
operation. For constant operation in above freezing
screwdriver under the edge of the instrument panel at
temperatures, electrolyte strength may be reduced to
the lock pins, and pry the panel away from the pins.
1.225 by diluting with distilled water. If the battery is not
Refer to figure 4-35.
fully charged, charge it.
4-34
|
|
Privacy Statement - Press Release - Copyright Information. - Contact Us |
