 |
|||
|
|
|||
|
|
|||
| ||||||||||
|
|
 d. Cleaning and Inspection.
(1) Clean the air cleaner body with a cloth
dampened with a cleaning solvent. Blow out dust and
dirt with a stream of clean, dry, low pressure (25 psi
maximum) compressed air. Direct the air stream in a
direction that is the reverse of the normal air flow.
(2) Blow out the air cleaner-to-carburetor air
hose with compressed air. If necessary, flush it out with
a solvent that is not injurious to the rubber.
(3) Clean all remaining parts with a cleaning
solvent; dry thoroughly.
(4) Inspect the air cleaner body for cracks,
severe dents, distortion, and other damage. Replace
the air cleaner if damaged.
(5) Inspect all other parts for cracks,
distortion, damaged threads or other damage; replace
damaged parts.
e. Reassembly and Installation. Reassemble and
install the air cleaner in the reverse order of removal.
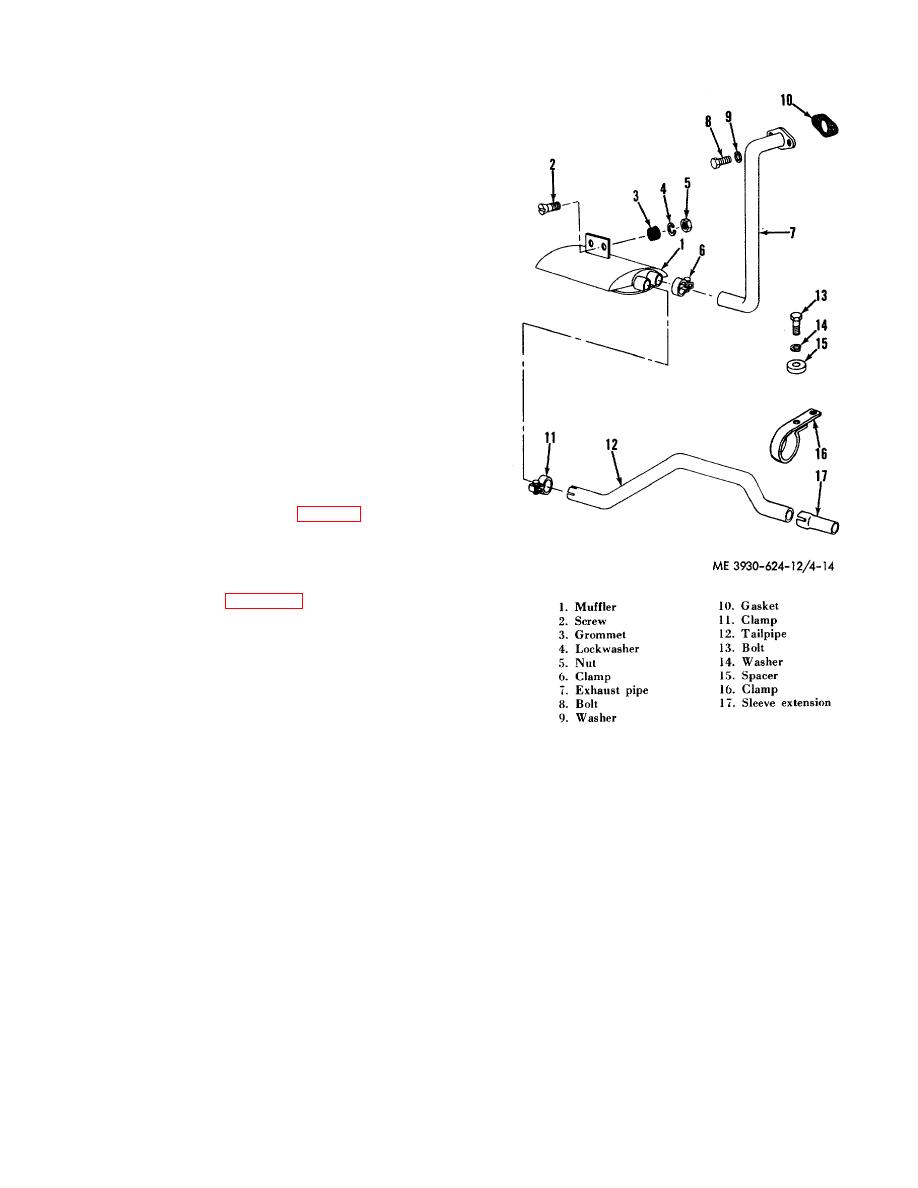
4-26. Exhaust Muffler and Piping
a. General. The exhaust system conducts the
exhaust gases from the engine through an exhaust pipe,
muffler, tailpipe and then discharges them into the
by directing the gas flow through a series of baffles.
b. Removal and Disassembly. (fig. 4-14.)
(1) Remove the driver's seat and left hand
engine side panel.
(2) Remove the radiator grille by removing
the capscrews, lockwashers, and washers securing the
grille to the truck frame. (para. 4-67.)
Figure 4-14. Exhaust system.
4-21
|
|
Privacy Statement - Press Release - Copyright Information. - Contact Us |