 |
|||
|
|
|||
|
Page Title:
Section IX. MAINTENANCE OF THE AIR INDUCTION AND EXHAUST SYSTEM |
|
||
| ||||||||||
|
|
 (a) Remove the ball joint (2) from the
d. Accelerator Shaft Removal.
carburetor control lever.
(1) Remove the bolt (12) and lockwashers
(b) Loosen the jam nut (3).
(13), washer (14), and nuts (15) which attach the shaft
mounting blocks to the front panel.
(c) Turn the ball joint so that the throttle
(2) Remove the assembly from the truck.
closes when the pedal is released.
(3) Remove the pin (9) from the accelerator
(d) ensure that full pedal travel opens
lever and shaft (10).
the throttle fully, adjust the adjusting screw beneath the
(4) Slide the lever and mounting blocks off
accelerator pedal (items 9 and 10, fig. 4-65).
the shaft.
b. Pedal Removal.
e. Accelerator Rod Removal.
(1) Remove the "E" clip (27, fig. 4-12) from
(1) Remove the accelerator rod return spring
the pedal hinge pin (28).
(5) from the spring clip (24).
(2) Slide the pin (28) out of the pedal (23)
(2) Remove the nuts and lockwashers from
and bracket (29). Remove the pedal (23).
the ball joints at the accelerator lever and throttle lever,
c. Shaft .Roller Removal.
and remove the rod (4).
(1) Remove the nut (17) and lockwasher (18)
(3) Ball joints can be removed from the
from the bearing.
accelerator rod by loosening the jam nuts (3) and
(2) Remove the bolt (22), bearing (20), and
unscrewing ball joints (2). The spring clip (24) may also
two spacers (19) & (21).
be removed at this time.
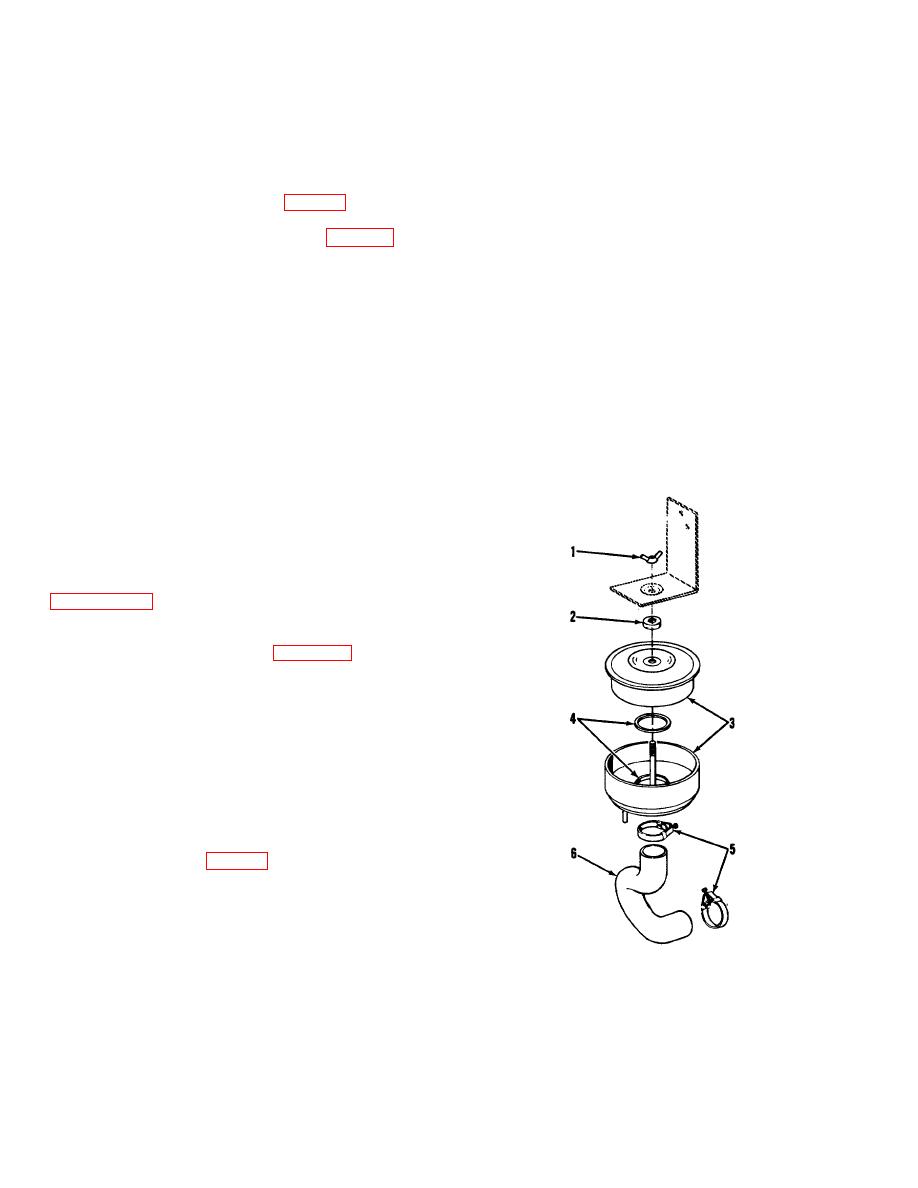
4-25. Air Cleaner
a. General. The oil bath air cleaner is mounted on
the left side of the engine and is connected to the
carburetor by a flexible rubber hose. It prevents dust
and foreign matter from entering the carburetor and the
engine.
b. Service. Service the air cleaner as directed in
c. Removal and Disassembly. Remove the air
cleaner. Disassemble the air cleaner to the extent
necessary for cleaning. Refer to figure 4-13.
Key to fig. 4-13.
1.
Wingnut
2.
Seal
3.
Air cleaner-top and body
4.
Gaskets
ME 3930-624-12/4-13
5.
Hose clamp
6.
Hose
Figure 4-13. Air cleaner and connections.
4-20
|
|
Privacy Statement - Press Release - Copyright Information. - Contact Us |
