 |
|||
|
|
|||
|
|
|||
| ||||||||||
|
|
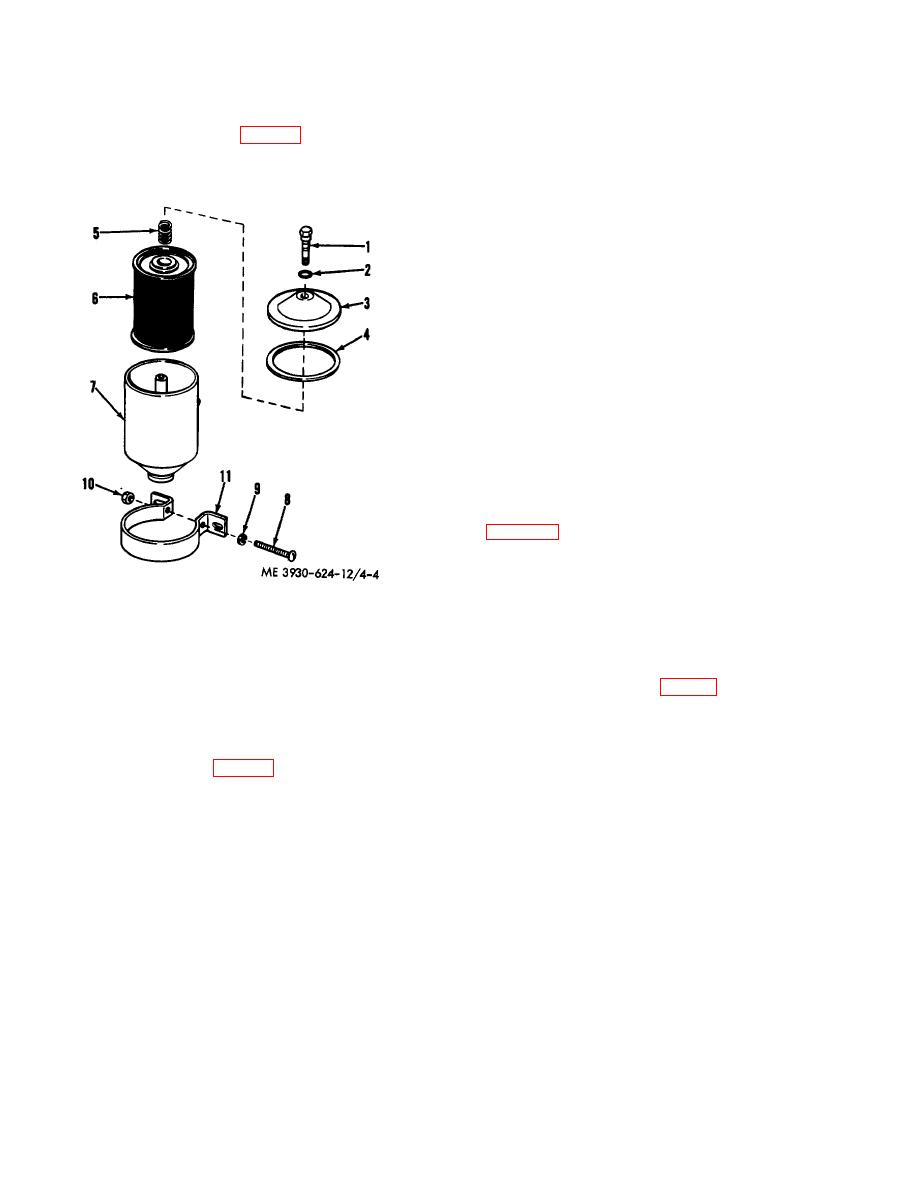 (2) Remove the bolt (1) and washer (2)
4-17.
Oil Filter Assembly
securing the cover (3) to the case assembly. Discard the
cover gasket (4).
a. General. The lubricating oil filter is a cartridge
(3) Remove the spring (5) and the cartridge
type. The filter is located on the right side of the engine
(6); discard the cartridge.
near the flywheel housing (fig. 4-4). A new cartridge
(4) Disconnect the inlet and outlet lines from
with gasket must be installed after each 250 hours of
the filter case (7). Remove the screw (8), lockwasher
operation, or more often if conditions warrant.
(9), nut (10), and strap (11) securing the case.(5) Clean
any dirt or sediment that has accumulated in the filter
base.
c. Installation.
(1) Place a new gasket in the cover and
lightly coat the new gasket with clean engine oil.
(2) Install a new cartridge in the filter housing.
Note. Do not overtighten the cover bolt.
(3) Place the cover on the filter housing and
secure it with the bolt.
(4) Start the engine and check for oil leakage
between the filter housing and the cover.
Stop
the engine and check the oil level. Add oil if necessary
to bring the level up to the "FULL" mark on the dipstick.
4-18.
Manifold.
a. Removal.
(1) Remove carburetor from the manifold
(2) Remove the self-locking bolts and
washers which secure the exhaust pipe to the exhaust
manifold flange.
(3) Disconnect the fitting which secures the
1. Bolt
7
Case
positive crankcase ventilation valve to the bottom of the
2. Washer
8
Screw
manifold.
3 Cover
9
Lockwasher
(4) Remove the self-locking nuts and washers
4. Gasket
10
Nut
which connect the manifold to the cylinder head and lift
5. Spring
11
Strap
the manifold off the studs (fig. 4-6).
6 Cartridge
(5) Remove the gaskets from manifold ports.
Figure 4-4. Oil filter.
(1) Thoroughly clean
the
filter
and
the
surrounding area.
4-12
|
|
Privacy Statement - Press Release - Copyright Information. - Contact Us |
