 |
|||
|
|
|||
|
Page Title:
CHAPTER 3 OPERATOR'S MAINTENANCE INSTRUCTIONS |
|
||
| ||||||||||
|
|
 CHAPTER 3
OPERATOR'S MAINTENANCE INSTRUCTIONS
Section I. LUBRICATION INSTRUCTIONS
(5) The oil may require changing more frequently
3-1.General
than usual because of contamination by dilution. Sludge
This section contains lubrication instructions which are
formation will increase under cold weather operating
supplemental to and not specifically covered in the
conditions.
lubrication order.
(6) Refer to the current lubrication order for the
3-2.Detailed Lubrication Information
correct oil to use.
e. Air Cleaner.
and store in a clean dry place away from external heat.
(1) Daily, check the amount and condition of the
Allow no dust, dirt, or other foreign material to mix with
oil in the air cleaner cup. If the oil level is low, or if the
the lubricants.
oil is dirty, service the air cleaner.
b. Cleaning. Keep all external parts not requiring
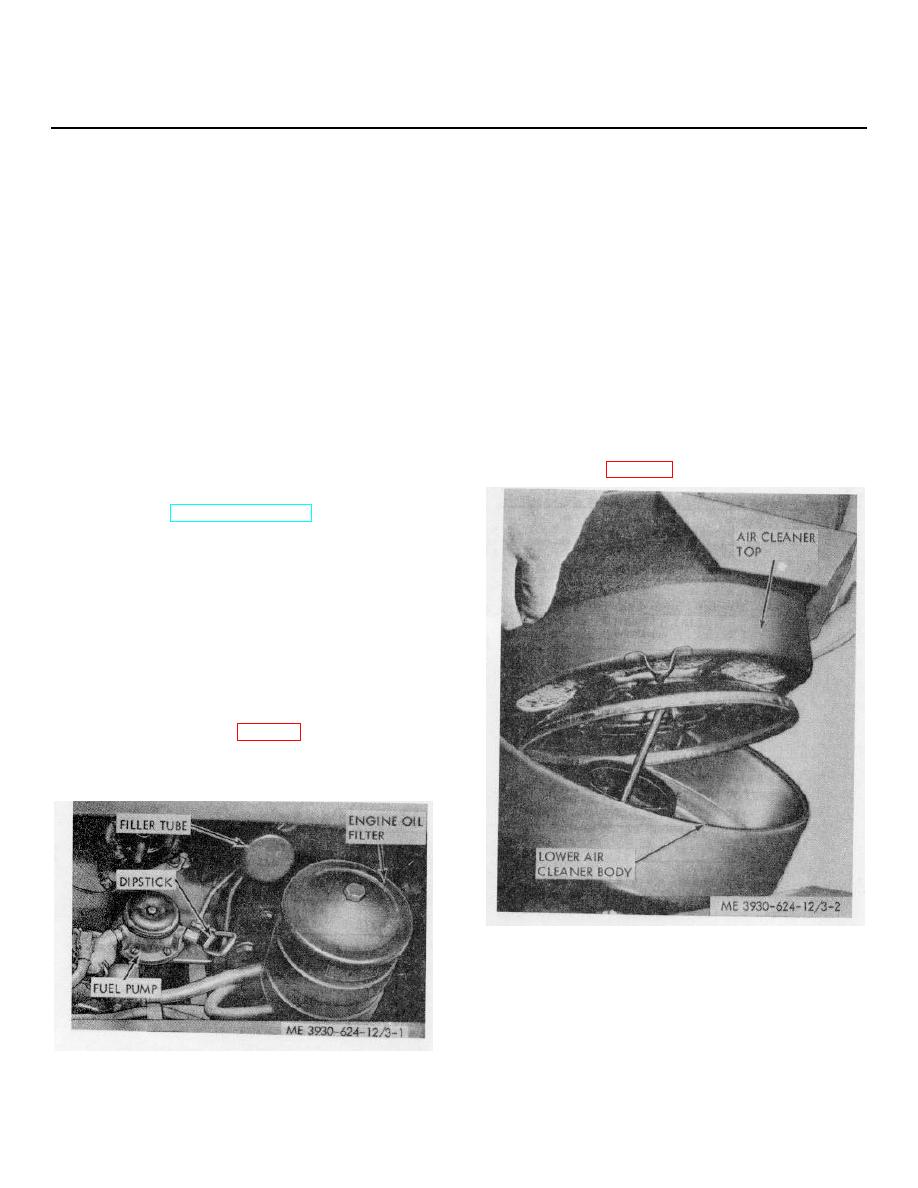
(2) To service the air cleaner proceed as follows:
lubrication clean of lubricants. Before lubricating the
equipment, wipe all lubrication points free of dirt and
(a) Loosen and remove wingnut and washer.
grease. Clean all lubrication points after lubrication to
(b) Separate the air cleaner top from the lower
prevent accumulation of foreign matter.
body as shown in figure 3-2.
c. Points of Lubrication. Service the points of
lubrication at proper intervals. Refer to the current
lubrication order (LO 10-3930-624-12).
d. Crankcase Oil Level.
(1) The crankcase oil level must be checked
every ten hours.
(2) In order to obtain an accurate measurement
of the level of oil in the crankcase, the engine must be
stopped and the vehicle parked on level ground.
(3) After stopping the engine, allow at least five
minutes for the oil to drain back into the oil pan.
(4) Withdraw the dipstick, which is located on the
left side of the engine (fig. 3-1) and wipe clean.
Reinsert all the way and then remove for a true reading.
Add oil as necessary to bring the oil level to the FULL
mark on the dipstick.
Figure 3-2. Air cleaner.
(c) Empty the oil from the cup and clean with
solvent; dry thoroughly.
(d) Fill the cup to the indicated level with fresh
oil of the same type and quality as used in the engine
crankcase.
Figure 3-1. Checking crankcase oil level.
(e) Position the air cleaner in place, secure
with the washer and wingnut.
3-1
|
|
Privacy Statement - Press Release - Copyright Information. - Contact Us |
