 |
|||
|
|
|||
|
Page Title:
Figure 2-12. Drag link removal and installation. |
|
||
| ||||||||||
|
|
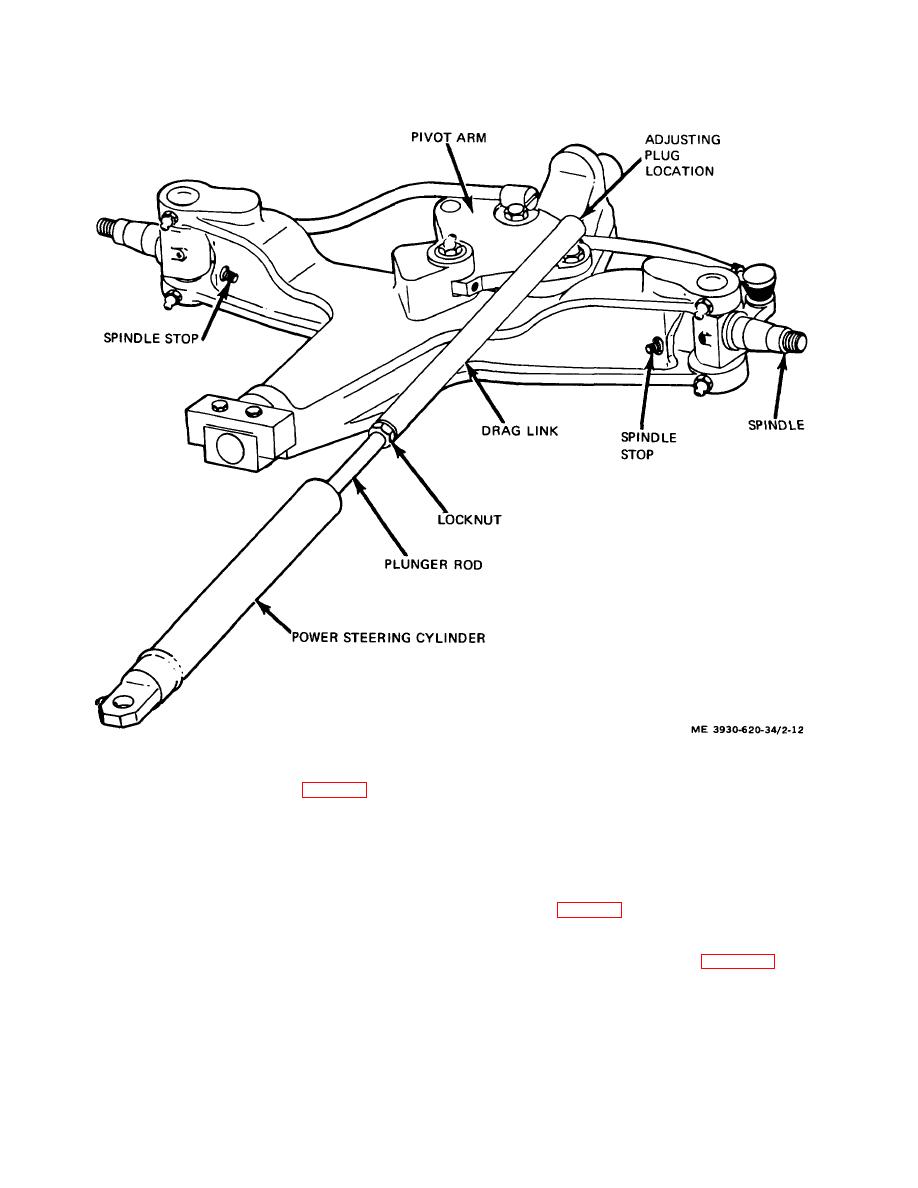 (5) Remove drag link from pivot arm ball stud.
(6) Loosen locknut and unscrew drag link
stud. from power steering cylinder plunger rod.
Figure 2-12. Drag link removal and installation.
steering cylinder. If necessary, adjust by loosening
locknut and moving plunger rod in or out.
(1) Position steer wheels in a straight ahead
(8) Install lifting device and remove blocking.
position (parallel with side of lift truck).
(9) Lower lift truck.
(2) Set the power steering cylinder plunger
rod half way out of the cylinder.
2-21. Steer Axle
(3) Screw the drag link onto the plunger rod
a. Removal.
far enough to install the drag link socket onto the ball on
(1) Disconnect
battery
and
discharge
the pivot arm.
capacitors (para 2-5).
(4) Tighten the locknut.
(2) Remove toe and floor plates (TM 10-3930-
(5) Tighten the adjusting plug just enough to
620-12)
prevent end play.
(3) Remove drag link (para 2-20).
(6) Secure adjusting plug in position with
Note. Make sure blocking will not interfere with removal of
the steer axle.
cotter pin.
(4) Place a suitable jack under the steer axle.
(7) Check that both wheel spindles contact
spindle stops to prevent bottoming of piston in power
2-16
|
|
Privacy Statement - Press Release - Copyright Information. - Contact Us |
