 |
|||
|
|
|||
|
Page Title:
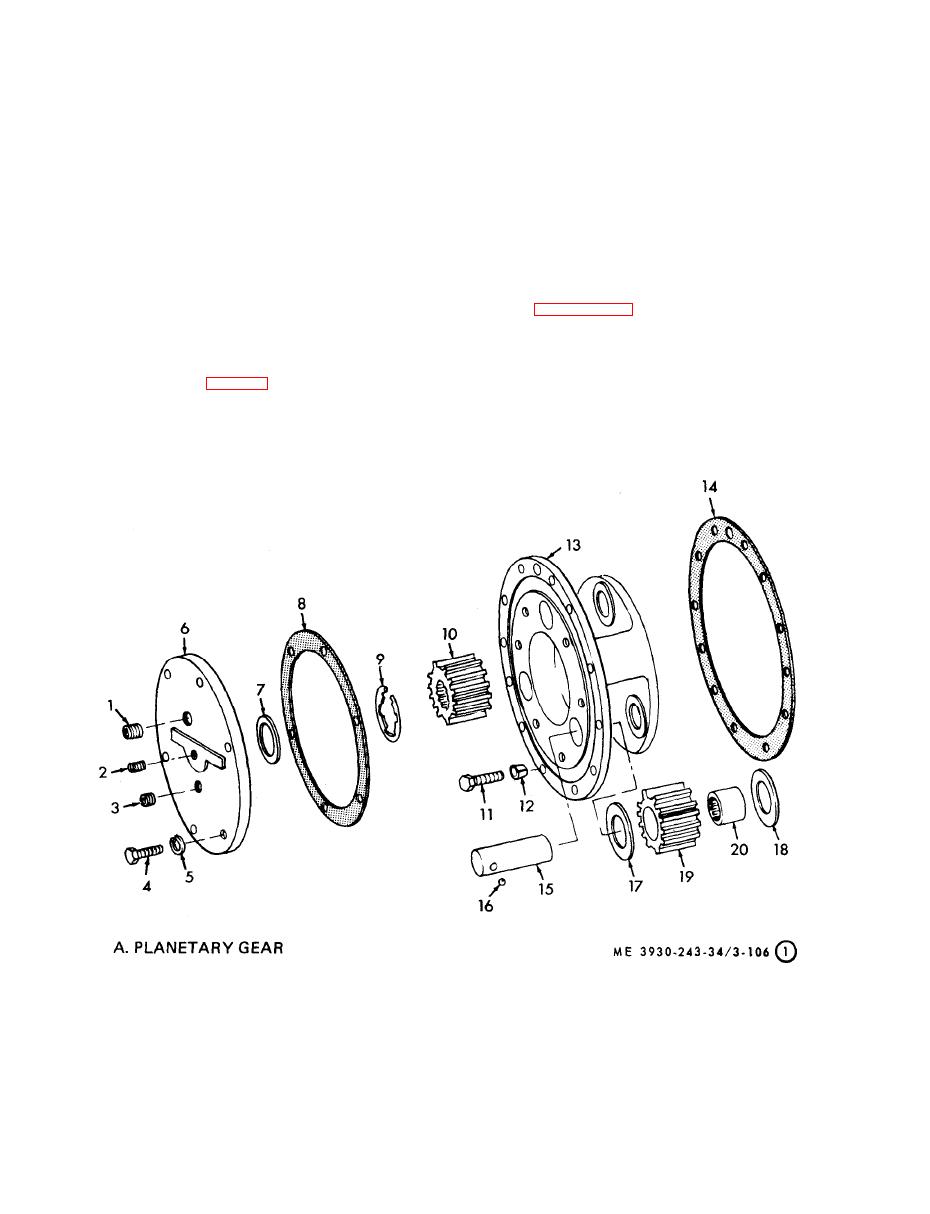
Figure 3-106. Axle assembly, disassembly and reassembly (sheet 1 of 6). |
|
||
| ||||||||||
|
|
 half case solidly to seat bearings. Back off nuts on
(d) Tap plain differential case (97) into
made during
marks
place, a l i g n i n g p u n c h
flange side, one notch at a time and follow with
disassembly. Install screw (95) and nuts (96).
opposite nut until correct backlash is obtained.
Tighten to correct torque.
(b) If backlash is under minimum
(4) Assemble the differential pinion and
specification, back off nut on flange half and
bearing (64 thru 92) as follows:
t i g h t e n nut on opposite side. Operation should be
done in one notch steps until correct backlash is
(a) Press pilot bearing (84) on drive pinion
(83), then stake in four places.
obtained.
(b) Press bearing cone (79) on pinion.
(c) T i g h t e n c a r r i e r c a p b o l t s t o s p e c i f i e d
Lubricate bearing.
t o r q u e . Recheck backlash. If backlash is not within
limits repeat above procedure to correct. Install
(c) P r e s s b e a r i n g c u p ( 7 2 ) i n t o p i n i o n
b e a r i n g case (73). Install new gasket (72) and oil
b e a r i n g adjusting nut locks and secure with screw
seal (71) in oil seal retainer (70).
and lockwasher; lockwire to prevent loosening.
Refer to figure 3-107 for correct tooth contact.
(d) I n s t a l l y o k e a s s e m b l y ( 6 7 ) .
(7) Install carrier housing (92) to axle housing
(5) Reassemble differential assembly in carrier
(124).
( 9 2 ) . Insure that punch marks on carrier leg (92)
( 8 ) Reassemble axle assembly in reverse order
a n d cap (91) are aligned for proper fit. Tighten to
of disassembly.
specified torque (para 1-4).
(6) Adjust backlash 0.006 to 0.016 as follows:
NOTE
Torque all bolts to specified torque as shown in
(a) If backlash is too great, back off ad-
j u s t i n g nut on plain half case and tighten opposite
s i d e until all lash is removed. Tighten nut on plain
16
Ball
11
Screw
6
End cover
1
Plug
17
Washer
12
Bushing
7
Washer
2
Plug
18
Washer
8
Gasket
13
Planetary case
3
Plug
19
Gear
9
Ring
14
Gasket
4
Screw
20
Needle bearing
15
Pin
10
Sun gear
5
Lockwasher
|
|
Privacy Statement - Press Release - Copyright Information. - Contact Us |
