 |
|||
|
|
|||
|
Page Title:
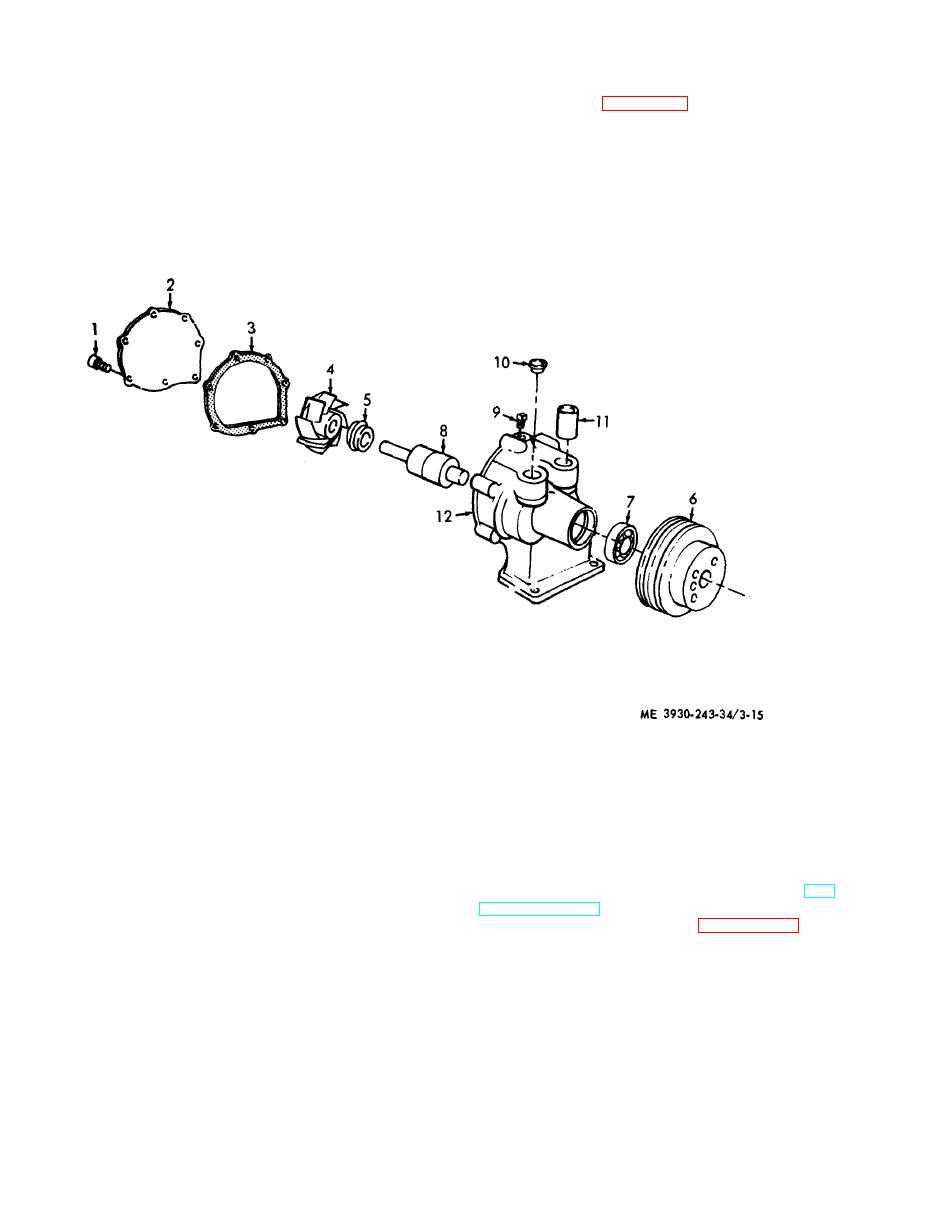
Figure 3-15. Water pump, disassembly and reassembly. |
|
||
| ||||||||||
|
|
 e. Reassembly.
d. Inspection.
(1) Refer to figure 3-15 and reassemble the
(1) Inspect the impeller for damage or ex-
water pump in reverse order of disassembly.
cessive wear on impeller face which contacts the
(2) Run the pump dry at 1200 rpm for 30
seal.
seconds to assure seating of the seal.
(2) Revolve the shaft bearings slowly by hand;
if rough or tight spots are detected, the bearing and
shaft must be replaced.
7
Bearing
1
Screw
8
Shaft
2
Cover
9
Plug
3
Gasket
10
Plug
4
Impeller
11
Nipple
5
Seal
12
Body
6
Pulley
f. Installation. Install the water pump (TM 10-
10-3930-243-12).
3930-243-12).
disassemble the engine generator.
d. Inspection.
DC generator. The battery charging generator is
(1) Inspect insulation, leads and windings.
introduced into the electrical system to provide a
( 2 ) Inspect commutator bars for roughness
s o u r c e of electrical current for maintaining the
and pitting.
s t o r a g e battery in a charged condition and to
(3) Inspect all bearings for excessive wear.
supply sufficient current to carry any other elec-
(4) I n s p e c t brushes for wear. Replace a
trical load requirements up to the rated capacity of
missing or defective part.
the generator.
|
|
Privacy Statement - Press Release - Copyright Information. - Contact Us |
